Thanks …now I totally wanna try manicuring a bud into a tiny figurine.
3 Likes
Our first grow was a clone we just stuck up against a cinder block fence (think HOT in summer) where the herbs were growing. Pretty much planted it and ignored it. It never got very big, I have no clue what it was but maybe a purple of some sort. Never researched a thing. It had spider webs on it (what I now know is most likely spider mites) and looked awful by summer end. We got about an 1/8th off of it and smoked it. No curing. Just let it dry out on the stalk and then smoked it. If I remember correctly we got a bit of a nice buzz from it.
You can see the little plant between our dog’s ears to left of the chives. I think it got about 18" tall at best.

3 Likes

4 Likes
So started out of a bathroom counter that was brought to my house that was not measured correctly. The foil is actually an extra large bag of dogfood, but wiped down and foil side out. My two reflective side panels are the side panels for my grill.


2 Likes


Like everything I do, I jumped into this hobby with moderately low expectations and enough just enough knowledge to be dangerous. Now I’m trying to climb the learning curve as fast as I can. a couple of weeks ago I realized it was “Amazon Day” and I went a little crazy with the light deals.
My grow room is a large closet in my basement. The previous owners put 1 foot shelves on all the walls, so I started hanging my old blurple lamps off a 2 x 4 x 8 stud that I just laid across the top of the shelves. But now with all these new light panels, I had to figure out how to hang them. A bunch of 4x4’s? Maybe but not ideal. I decided to build a grid with 2 2 x 4’s going lengthwise and 32 inch furring strips every 15 inches across (the width of most of my panels). I added pipe insulation to the edge of the furring strips where I approach the set-up as I knew inevitably I would bang my head (a dozen times and counting already).
I bought 6 6 packs of hooks from Menards and put them where I wanted on the grid - they can screw in to any of it since it’s all lumber. It was great at first, but as the plants have grown I’ve needed to adjust the position of the lights, and I don’t have dimmers, so I have been adding lights as needed - I’ve got 1000 Watts going now - so I added more furring strips floating unattached laying across the grid perpendicular to the original furring strips which were attached.
I bought a 40 pack of 2 inch carabiners on Amazon, and used it along with measured lengths of tied off parachute cord to hang everything at the exact height and angle I wanted, and I’ll probably have to change it again in a few days as the plants grow.
It looks pretty damn ghetto, but essentially I can customize it continually to make sure I’m using my panels as efficiently as possible. Right now there are 2 flowering plants under 700 watts on the right, and 2 sprouts getting ready to Veg on the left under 300 Watts. The entire rack can be raised up to 12 inches if the plants keep getting taller - the Zkittles had a massive growth spurt and I’m not sure it’s done.
Here’s the set-up:
Front

Lights:

From the top

Top looking down

I’ll be switching to photo’s after a few rounds of auto’s to get my feet wet, and if this works out, and I don’t see a better way of doing it on here, I’ll probably build another one for the other side of my grow room and section each half off with panda film. Right now I think 1000 Watts is probably overkill for 4 auto’s, but I’ve got the lights… I’m working with a 4 plant rotation, and eventually can perpetually keep 2 photo’s in veg and 2 in bloom by moving a bloom lamp from side to side when I change the light schedule.
7 Likes
First day of flowering photo period, 5 Critical+ 2.0 and 4 little in the middle AK-47.
Critical have 1 week and a half of veg, the others just 1 week.
There’s also a sativa in the back.
Really proud of my babies under a mere but powerful 400watt hps


3 Likes
Nice! Simple and sweet ![]()
2 Likes
Thank you @Nia2688 ![]() just had twins today well ones a auto, ones a photo woooo hoooo and so it starts
just had twins today well ones a auto, ones a photo woooo hoooo and so it starts
2 Likes
Congratulations on the twins ![]()
1 Like
Im not in a legal state so im just doing a ghetto closet grow. Using a ts600 and ts1000. 3 weeks since i switches to 1212. Bigger ones goldleaf and other super skunk.


2 Likes
Cheap amazon led lights, Mylar blanket, 7 gallon fabric pots, dollar store fan, and fox farms soil in a shed with poor ventilation. I am happy for my first time!!!


5 Likes


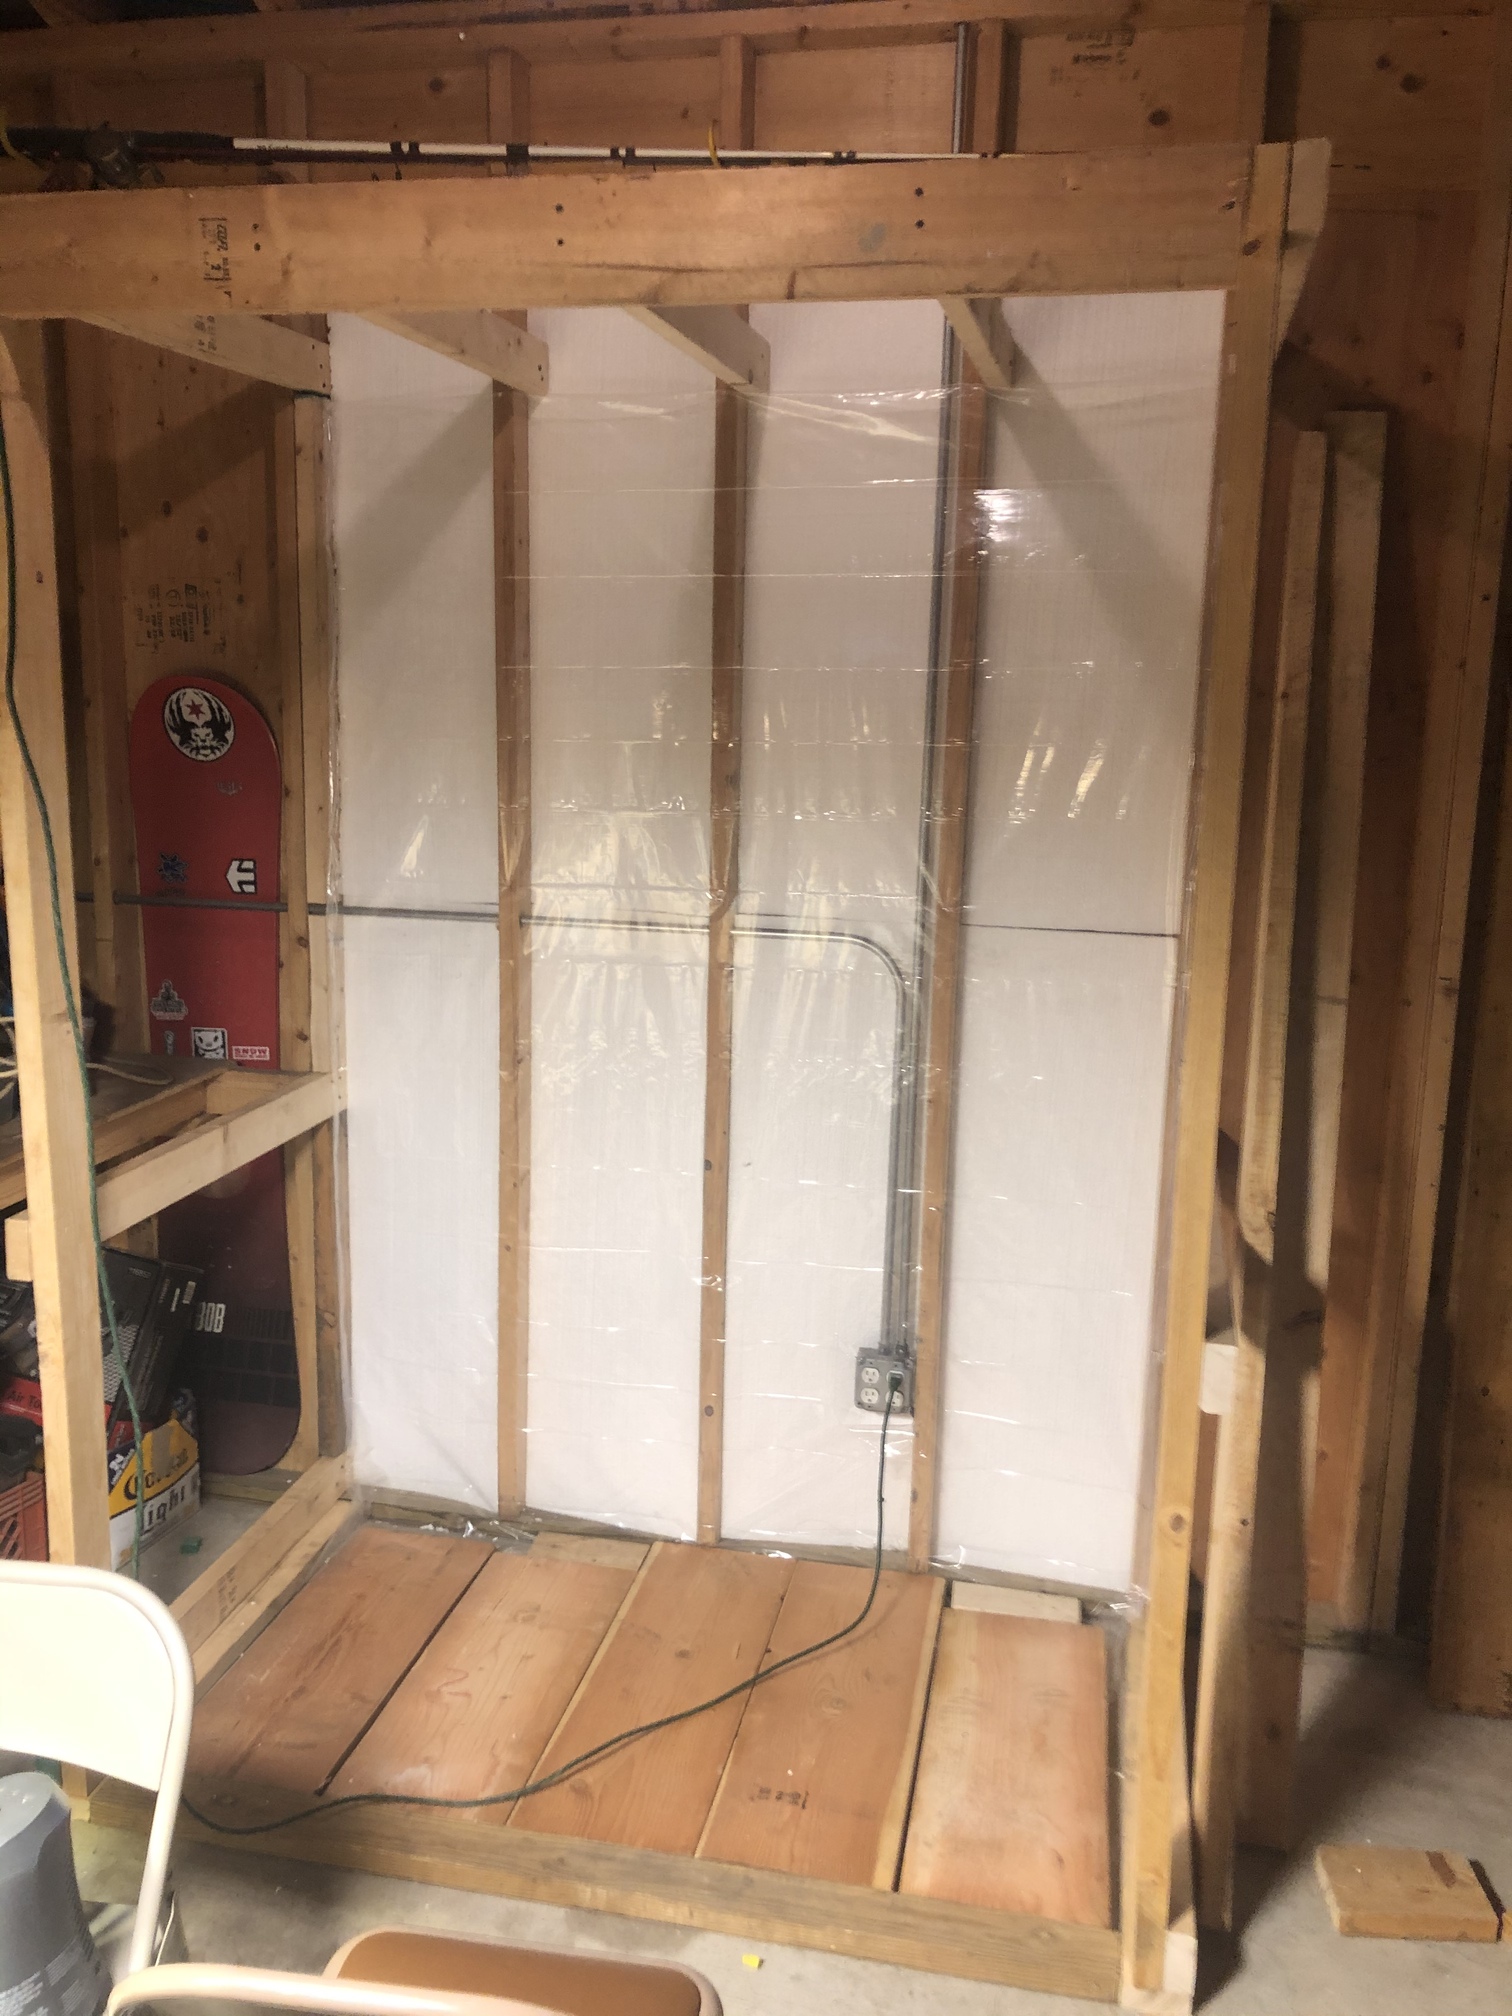

I’m new to this but wanted to add to this thread. I’m starting out building this closet in the garage. Styrofoam insulation then plastic wrapped the wall for a moisture barrier.
Next step is putting up the ceiling. Always do the ceiling then the walls because the walls help hold up the ceiling.
Will post tomorrow after I finish the ceiling and walls.
2 Likes
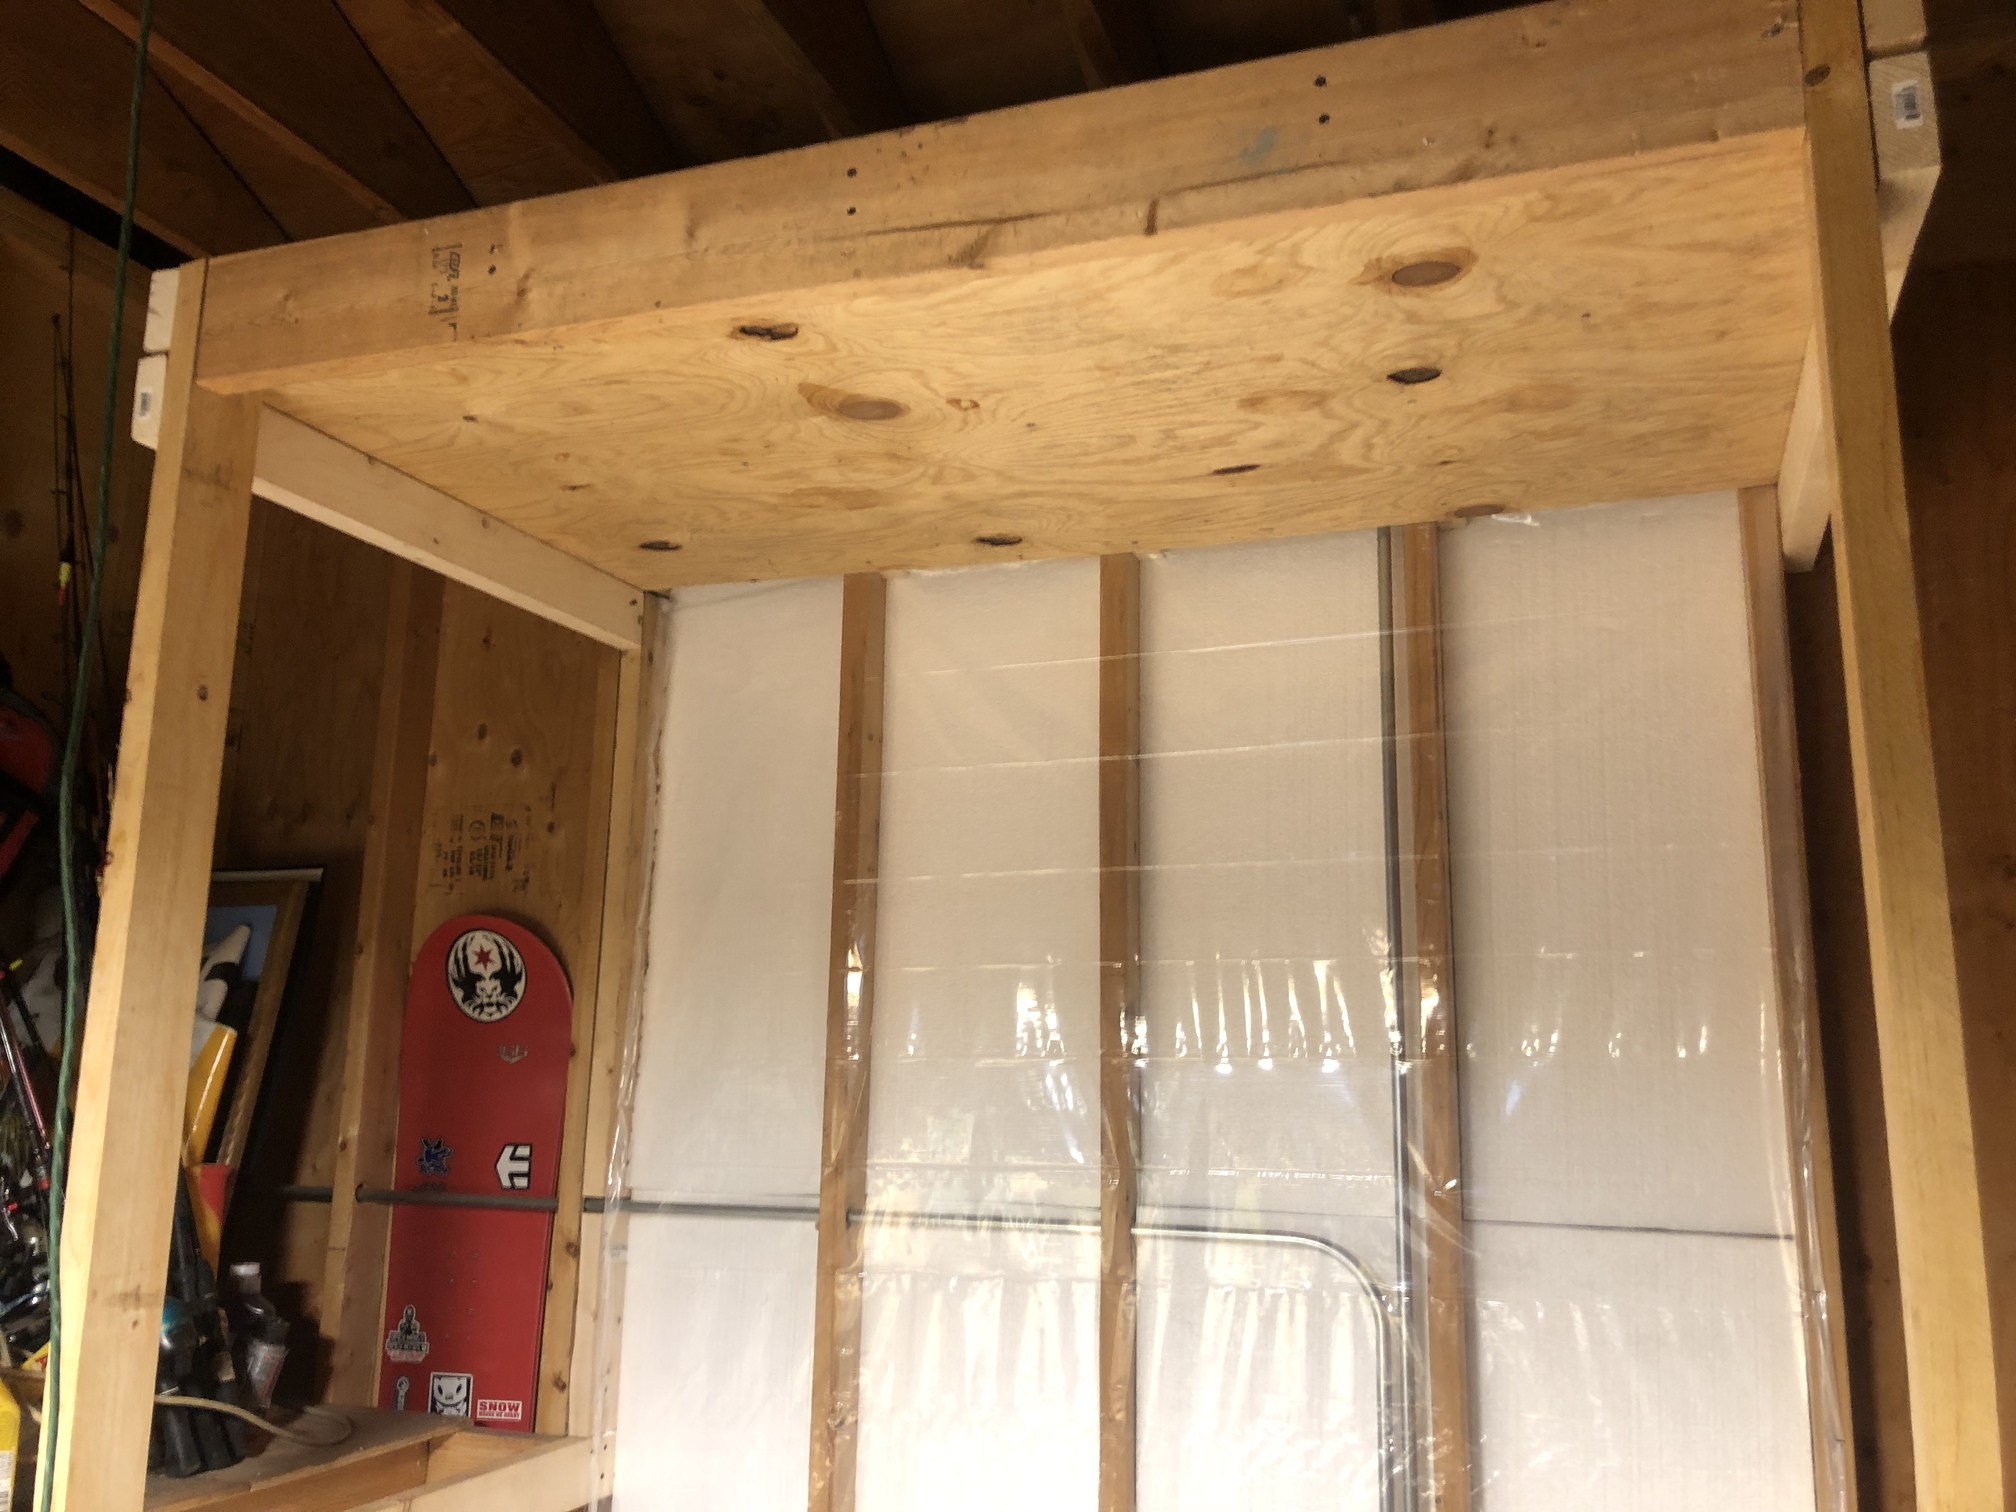
Ceiling up.
Next cutting pink insulation board for the sides the a layer of plywood with a layer of plastic in between. Hoping to get the wallls up today. ![]()
2 Likes


So I forgot to mention why I consider this a ghetto grow room is because I am re using wood from wooden crates from work.
6 Likes


4 Likes


Coming along. A layer of emergency blanket at top of wall. To attach I put a little piece of duct tape on it and staple thru it. Holds in place better than stapling straight to Mylar blanket.
1 Like
Reflective heat shield is on the lower part of the wall.