5x5 tent. I have 3 and 5 gal aerated pots. Was wondering what everyone uses in their tents for drainage/runoff? Looking for some simple ideas
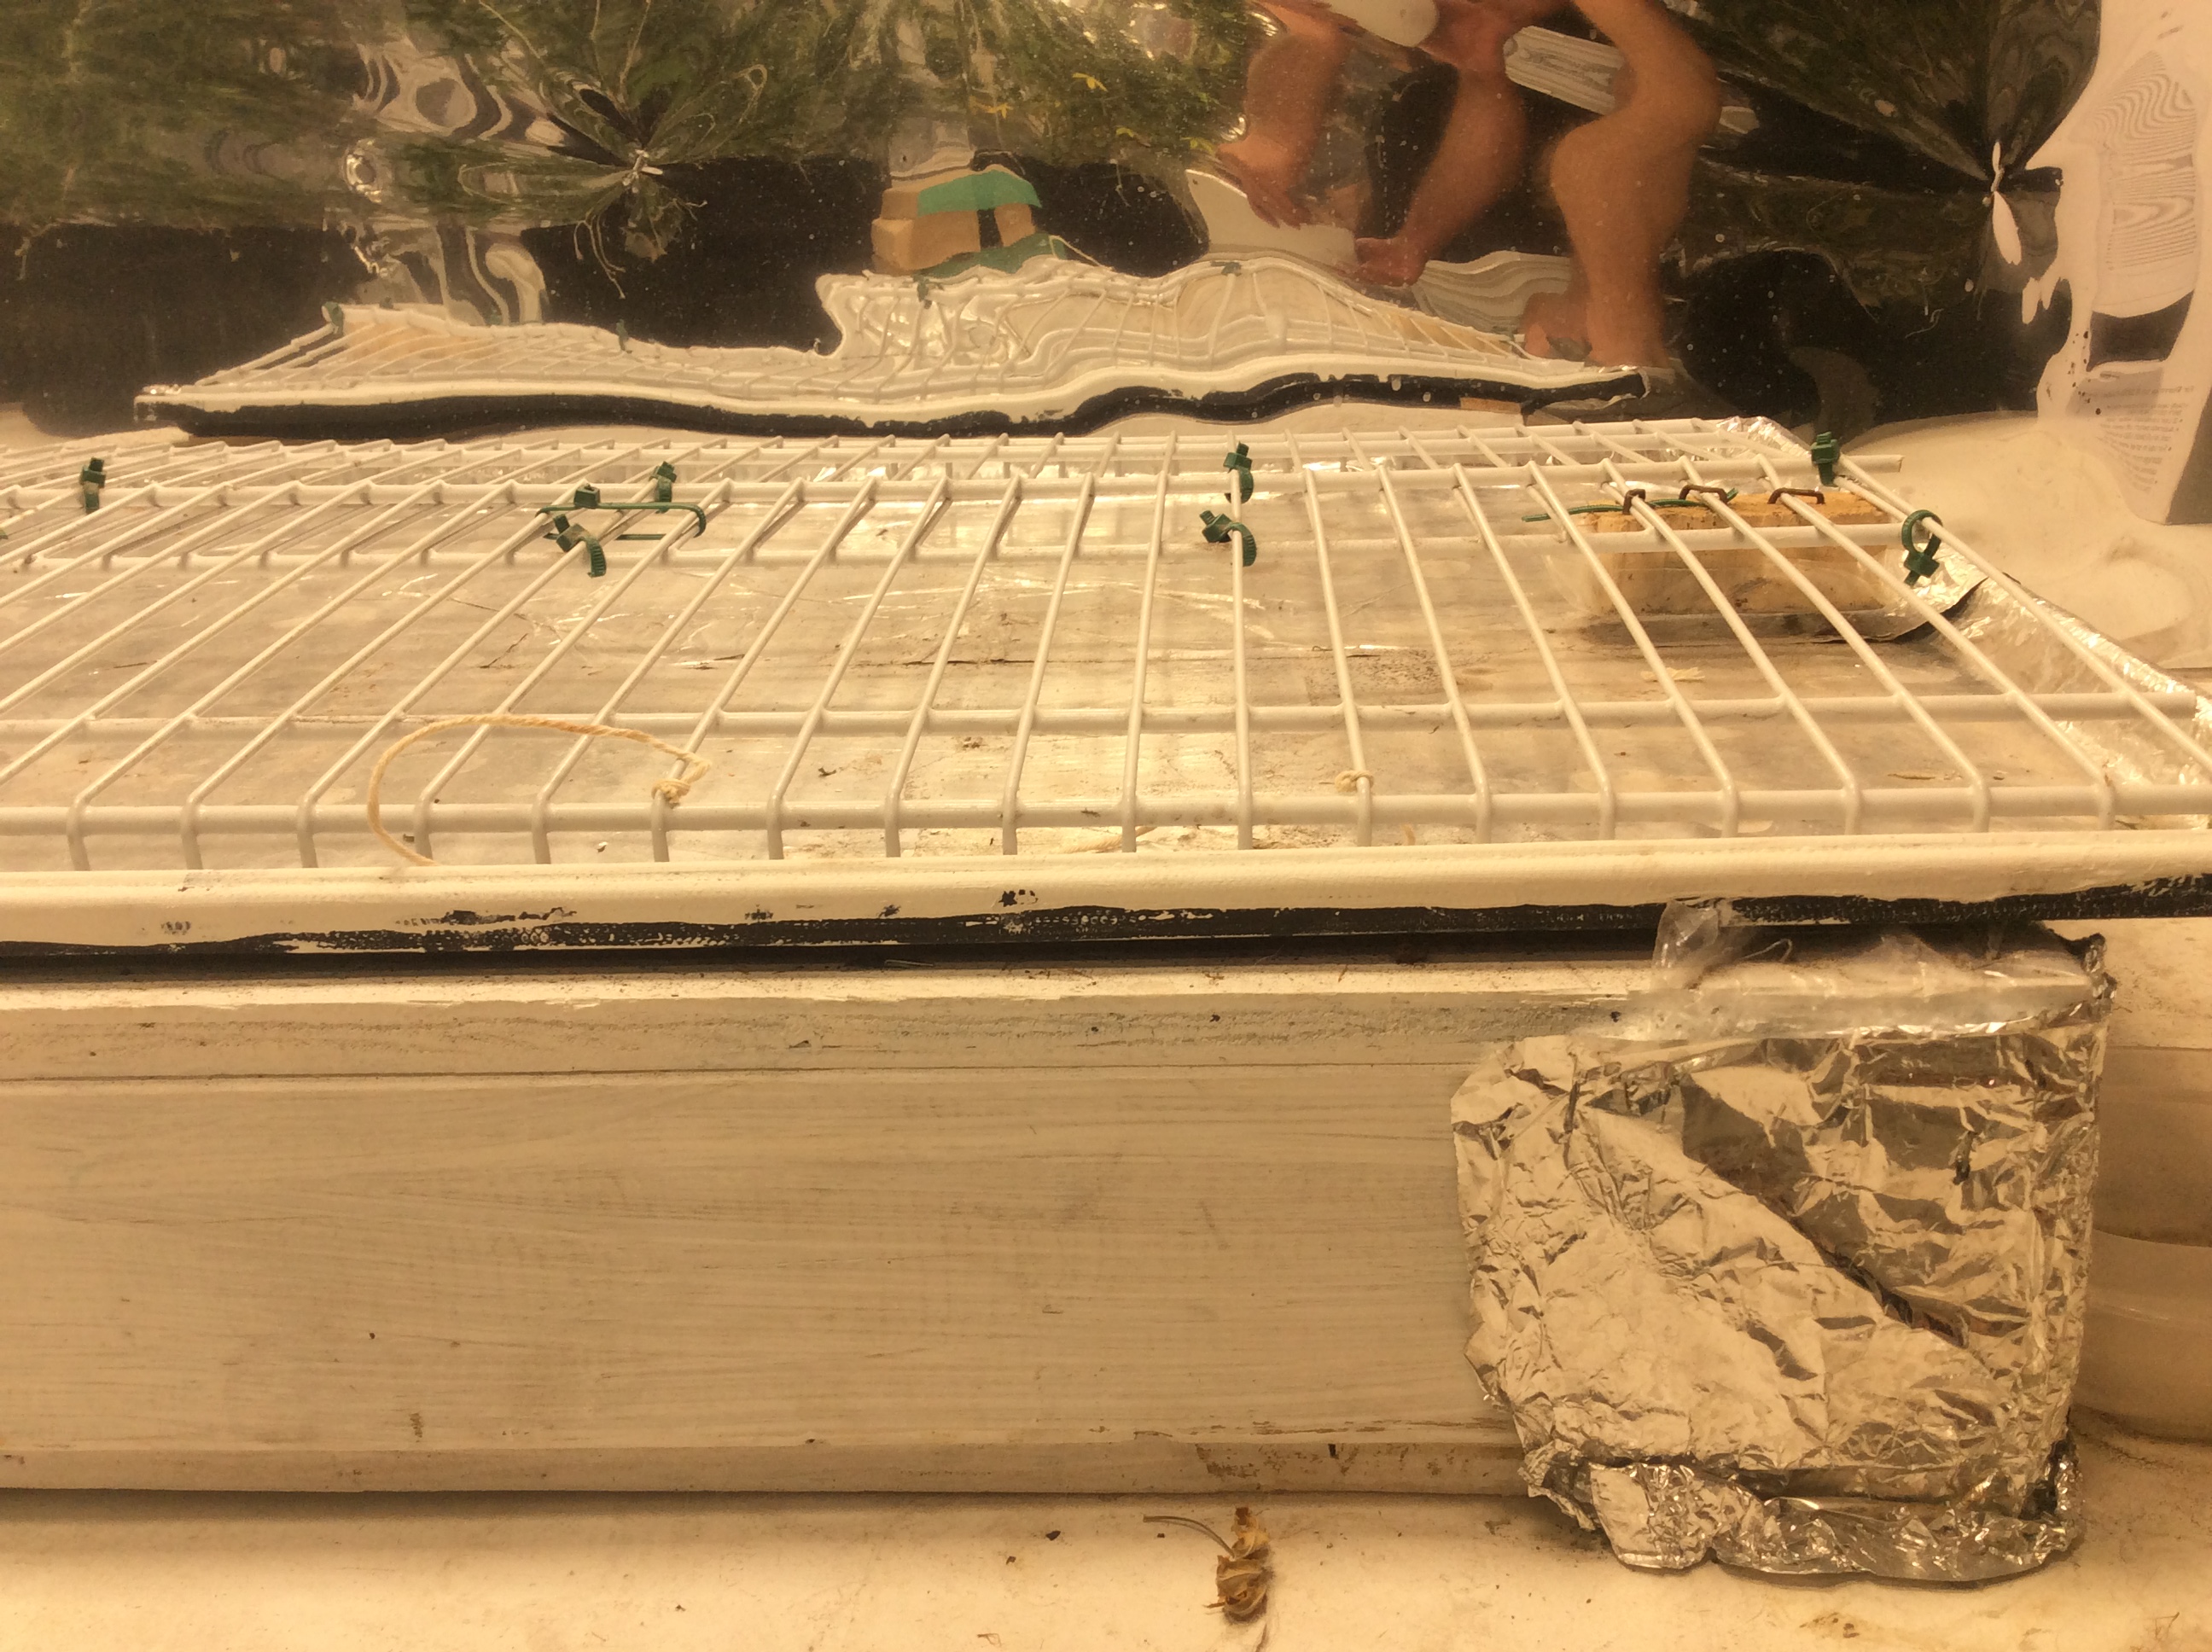
I went to petco and bought a 36”x24” tray for the bottom of a dog crate. I had some closet shelving laying around that had a 2” lip on it. I did some stoner engineering and was able to fasten two pieces together at the width I needed. Each side now had a 2” lip so when I sat it in my tray, the pots would be held up off the bottoms of the tray. I then built a box made of 2x4s. With a piece of plywood on top. When I built it I cut the bottom 2x4s at an angle so it would slope just a little to one corner. Then I drilled a 1” hole in the corner, at the low end of the bottom tray. Then I took finishing nails and secured the tray to the 2x4 box. But I left the tray over hang just a little so I can slide a catch pan under the hole. It took a minute to build it all. But it makes watering so easy and mess free. Easily catches my runoff for testing. I covered the botttom of the tray with shiny foil to help reflect light versus the pale black color of the tray. Works great for me. Hope this kind of helps
But I’m also in a basement and the box was more for just getting them off the cold floor. Some people use tin foil pie pans, or those roasting pans. I just liked the idea of my pots sitting up and not be sitting in standing water.
Superb answer sir. I’m right there with you on wanting them to stand up a bit from the drip tray. I feel like an idiot because I’m in the HVAC field and a condensate pan for an air handler would be perfect. Digging the foil tape idea also. Love a good macgyver story
2 Likes
Macgyver? @Handyandy Your going to make me blush with all the compliments. ![]() . I’m not sure what you were referring to when you mentioned the condensate pan. But going by the name it sounds perfect. Lol. Cannnais growers are some of the most creative and useful people out there. I’m sure we all have seen water bongs made out of all kinds of scrap from junk drawers. Lol. Not to confuse…but I just used aluminum foil for the bottom…not tape. The foil can easily be removed and new piece laid in if the first one gets too dirty from all the runoff.
. I’m not sure what you were referring to when you mentioned the condensate pan. But going by the name it sounds perfect. Lol. Cannnais growers are some of the most creative and useful people out there. I’m sure we all have seen water bongs made out of all kinds of scrap from junk drawers. Lol. Not to confuse…but I just used aluminum foil for the bottom…not tape. The foil can easily be removed and new piece laid in if the first one gets too dirty from all the runoff.
@PP3121. What time zone you in? You be up. For awhile. I’m in the Midwest, almost 8pm. I got company right now…but I’ll be working in my room here in a little while. I’ll send ya some pics. If you don’t get them tonite… check back in the morning and they should be up. ![]()
I’d like to see also


Hey @NugFlush. That is awesome! I can really see the explanation now in its grandeur. You have really given me great insight for my next grow. I was struggling with getting runoff for measurements, and I can see this method also very useful when flushing occurs. ![]()
Time to dig up the basement and see what trash/treasures are lurking for new usage. ![]()
No problem @PP3121. I’m going to change things up in my next grow. The square box I made was perfect but just wasn’t big enough. The 36” x24” platform was perfect for my 6 three gallon pots at first. But when my plants got bigger, I needed to space them out to account for the side branches growing into each other lol. Guess I didn’t realize how wide my plants would get. (Good problem to have lol). I also quickly realized my sf-2000 was not enough for coverage. So next grow I’m going to purchase another sf2000. I’m going to build two new boxes(like the one I posted, just different measurements) Each box will accommodate 3 plants each. I grow in a room 6x8 in my basement, concrete floor. I’m going to put a box each side of my room, with three plants on each and both will have its own sf2000. I’m hoping it leaves me enough room down the middle where I can access the plants. I need to get one of those little mechanic stools with wheels, then I can wheel myself around and take care of my girls. Lol. Let me know if ya need anything else. Put your Mcgyver skills to work. Lol. .let me know what ya come up with. Stay safe and stay medicated🤯
1 Like
Seriously, this really helps for the next grow. I will do my best MacGyver impersonation!
In time though as I’m trying to get this first grow under my belt! ![]()
Love it! Ingenuity at its finest. I’ve got a couple ideas floating around, I’ll be sure to share once I land on one. Also, the outlet is just flat out GENIUS!!! Such a simple yet, eye opening idea lol. How do you run your sf2000?? I have the sf4000 in a 5x5. Only grown one plant so far but have 9 germinating to go in soon. Do you adjust height and/ or wattage? I’ve seen where they give you recommended heights for different stages but nothing so far about wattage. Also see some people never move it at all. This will be my second grow ever and this one will be alot different than the first, especially for light placement. Thoughts?
1 Like
@Handyandy as far as the light you just kind of got to play with it to find the sweet spot. There is no definite distance when it comes to LED. They all are different, different bulbs, thickness of glass, angle of bulbs and so on. I’d start out about 18-24 inches. I kept mine dimmed down while they were young. And them just increased little at a time. I’ve found about 18” is best distance to keep,light away from canopy. However the health of your plants also plays a role in this. Obviously a sick plant will not take the light Intensity as well as a healthy one. Just don’t use too much light when they are young. Slowly turn up,light Intensity and possibly move it closer, trust me…they will tell you if you get the light to close. But if you move it little at a time, your not going to do any major damage as long as you keep an eye on them. If you see signs of light or heat stress, them simply move the light up. Best of luck…feel free to ask anything else. ![]()
1 Like