I’m going to have continuous grow Journal, looking for good tasting weed. These grows will be in Coot’s living soil ( but I’m not a purest). Every feeding will have yucca, aloe Vera, silica, humic, and recharge in it. First seeds in this hunt will be Super Silver Haze (Skunk,northern-lights, and Haze cross )Sativa. Next up is Fuel D.OG ( Chemdog (Sour Diesel x OG Kush) and Fuel OG (|Diesel x HeadBand).70% sativa 30% indica
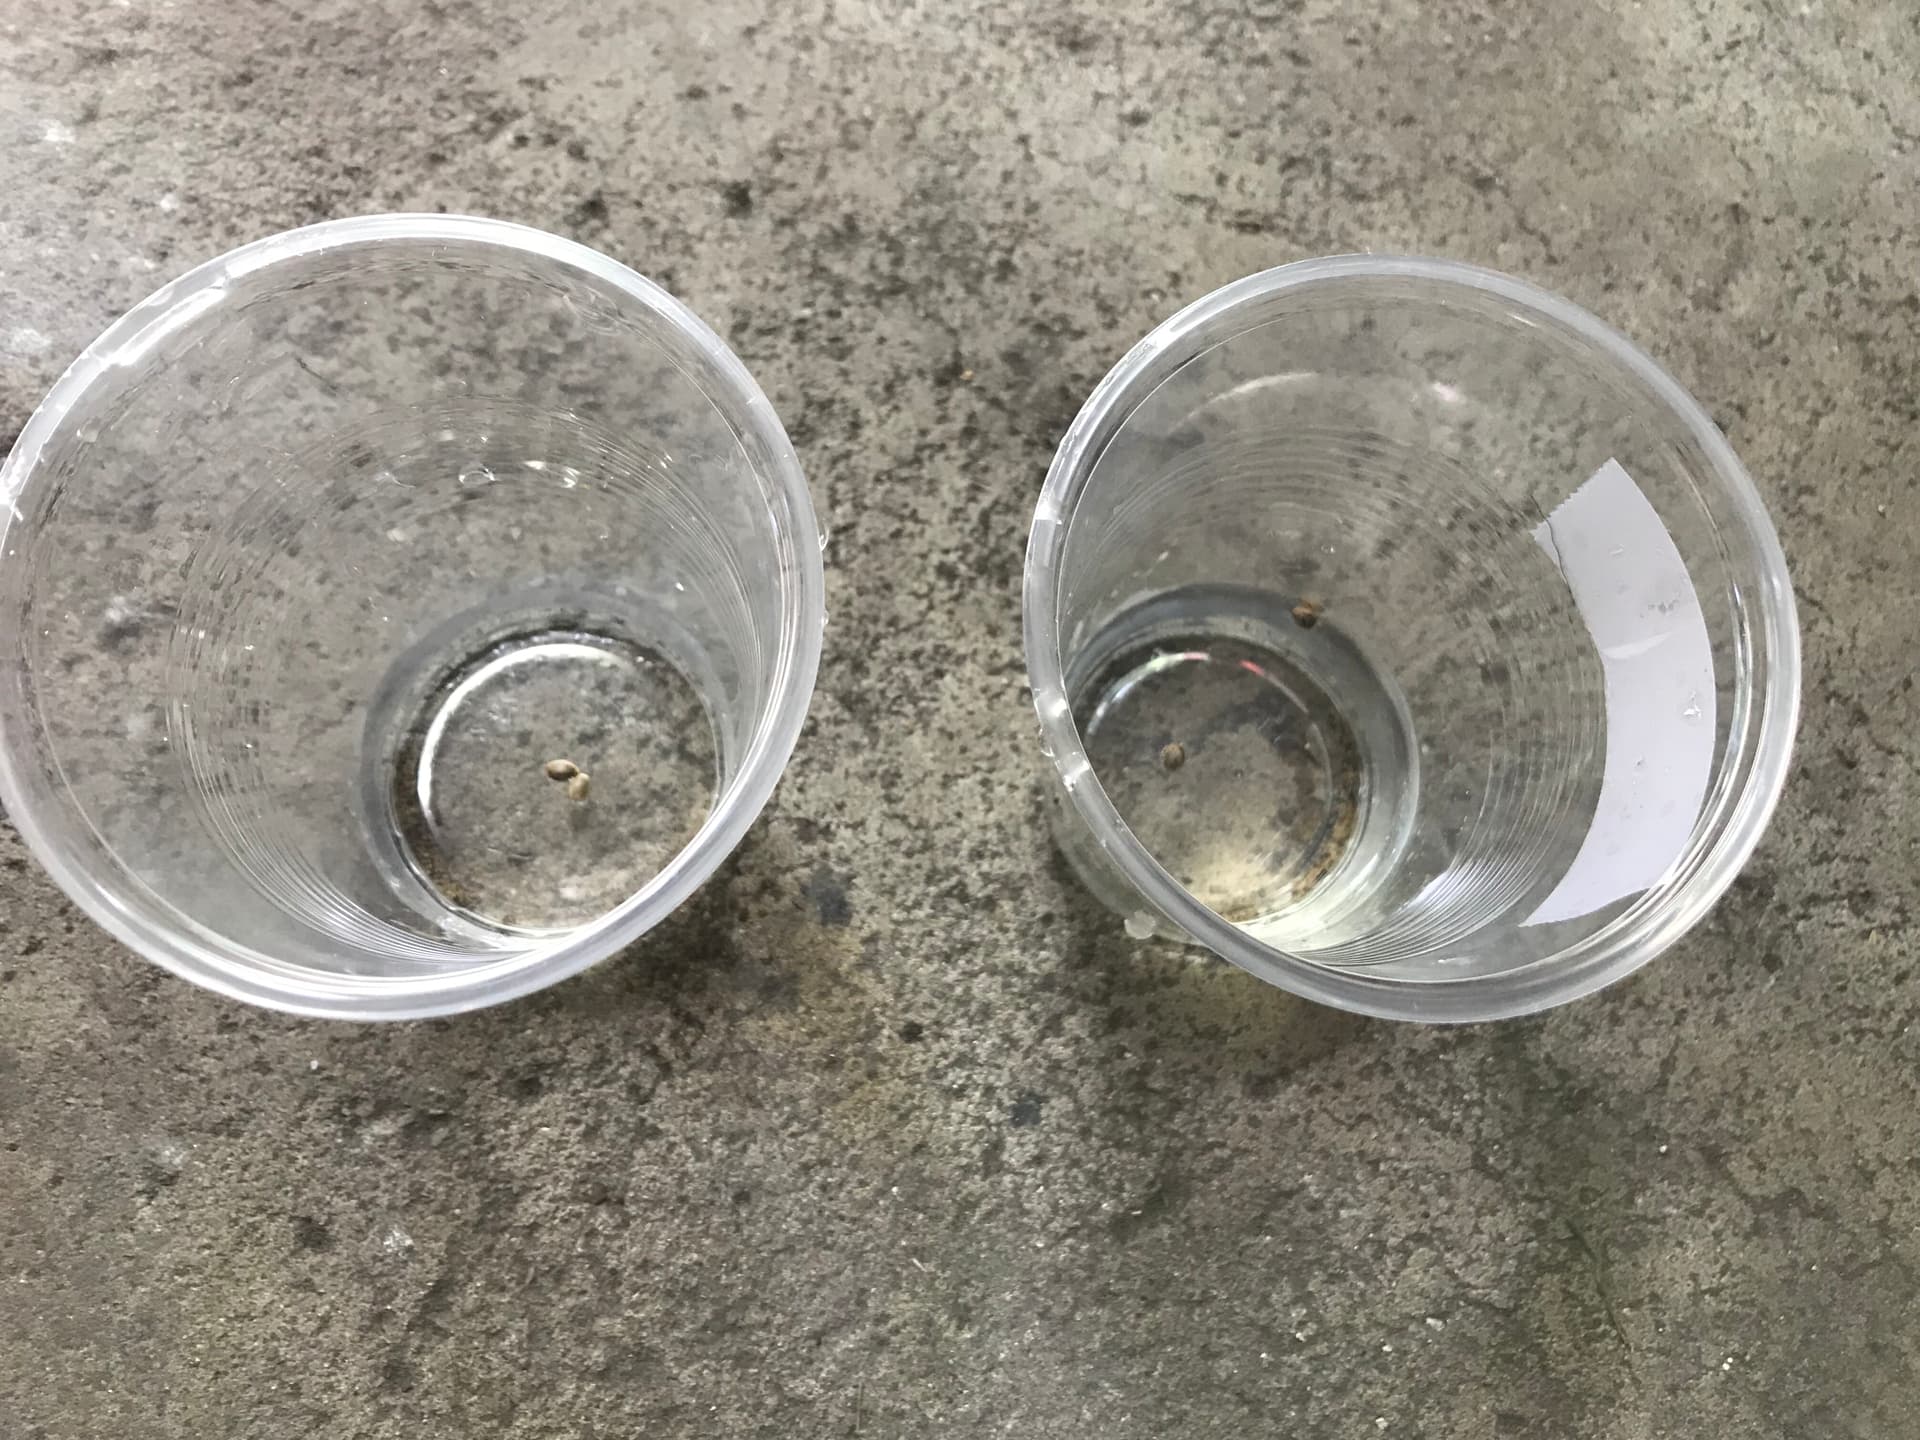
First day soak seeds for 24 hours , then place them in damp paper towels for 1-3 days . I have a 100% tap root rate. After that grab some clear and red Solo cups. Put air holes in them. Bottom and sides. Place the soil of your choice in the clear solo cup. ( I use happy frog, it’s has 2-3 weeks of nutrients in it ). dampen soil till run off, and let sit while you get your germination products . I use aloe vera, Azos (Azospirillum Brasilense a nitrogen fixing microbe ), and Mykos ( mycorrhiza, beneficial fungus that increases nutrient and water uptake by forming a symbiotic relationship with the roots of a plant. Mycorrhizae is needed to break down, cycle, and retain nutrients as well as provide a front line of defense against environmental stresses, pathogens, and diseases. Good shxt. Don’t waste your money by watering it in . It needs root contact). I use it in germination and every transplant. Make a quarter inch hole in your soil add your germination products. Place your seed taproot down in the hole. Lightly cover. Take a spray bottle and lightly mist your seedlings. Place your seedlings clear cup inside the red cup ,and under adequate lighting. Now the fun begins

10 Likes
Looking good man!
And very concise explanation of what you’ve done.
That’ll be a great help to others!
Good Luck with your grow!
1 Like
I’m currently on my first grow and using FFHF all the way through. I am very interested in a living soil grow though. I’ve seen some incredible results around. Buds literally dripping with glistening resins. Mmmmm…
I’m not completely new to growing and actually attempted about 25 years ago with a 400w metal halide that I actually still have in the garage! LOL! I was young and impatient.
Now I’m old and semi-retired! Life makes it possible for me to really focus on the grow now - maybe too much! ![]()
If your first two posts are any indication of the things I’ll be learning and the precise explanations of, I will get a TON of information following your grow. I see a LOT of cut/paste in my future!
Get any parking meters today? ![]()
Tyler’s not really my name - it’s from the Fight Club DVD packaging! ![]()
![]()
The full quote is “Tyler says use soap” LOL
Although, Luke could actually be yours! ![]()
Damn this Pineapple Cake!!
Happy Growing and I’m set to watch and learn!!
Appreciate your work man!
1 Like
I’m going to try to make this a educational thread. Explaining as much as I can. The goal is growing healthy plants with strong root system. Pushing high population of microbes. Weed should taste good without giving up yield . Yield is not my goal , but healthy plants produce. @Arrow , @Cannabian , @MrPeat , @Covertgrower , @Hellraiser . If you can stop by and give some of those golden nuggets of info when you can . I would appreciate it.
7 Likes
you off to a good start Mr ![]() …
… ![]()
![]()
1 Like
Mycelium does so much more! I dont really need to add it because I grow in the ground. My soils contain it abundantly. There is some evidence to suggest that not all communicate with every plant species, and there are types that connect internally to the plant and ones that connect externally. Anyway, thats a whole chapter on its own!
2 Likes
Mushrooms?
Can you add those to pots in a living soil?
Any particular strain…? ![]()
![]()
1 Like
Why yes! Some you can! You will need to research that part on your own… its a whole different thing. Suffice it to say not all mycelium creates an above ground fruiting body.
3 Likes
I’ve actually done a fair bit of reading on cubensis propagation, it’s not easy.
Comapared to that growing marijuana is a cake walk!
I’m really revved up to learn more natural approaches.
I’m glad I opened and read the thread.
2 Likes
Any time Luke
Love to hear this, I’ve experimented with a few things, and microbes, along with organic solids in the medium I believe are key to terpenes.
3 Likes
@Covertgrower , I totally agree with you , I’ve had some dank weed from bottles . But living soil is so forgiving. Corrects water intake ,bad PH, and just makes your plants healthy and happy. Makes a average grower like me , put out some decent weed. Thank you for checking in and any info you can add to help new growers is appreciate
4 Likes
Get to know what the weight of your plant is after watering, by picking your plant up. After a little practice, you will know if your plant needs watering by the weight. Be careful with seedlings, they do not need much water . About 5-20ml a day. You can kill your new seedling with kindness.

4 Likes
They look slightly over watered and maybe the beginning of being root bound. I will be transplanting them Saturday. So they better suck it up… watch how they respond to living soil.

3 Likes
Can’t wait to watch the veg in the living soil.
I’m still a few months away from starting the next grow so I still have time to plan and gather materials.
To me, watering is the hardest thing to get a grip on. Next run will either be a single plant, or a single strain at least. Hopefully that’ll cut down a little of the stress and work, and hopefully contribute to a bigger yield.
Can’t wait until Saturday!!
HGE!!
1 Like
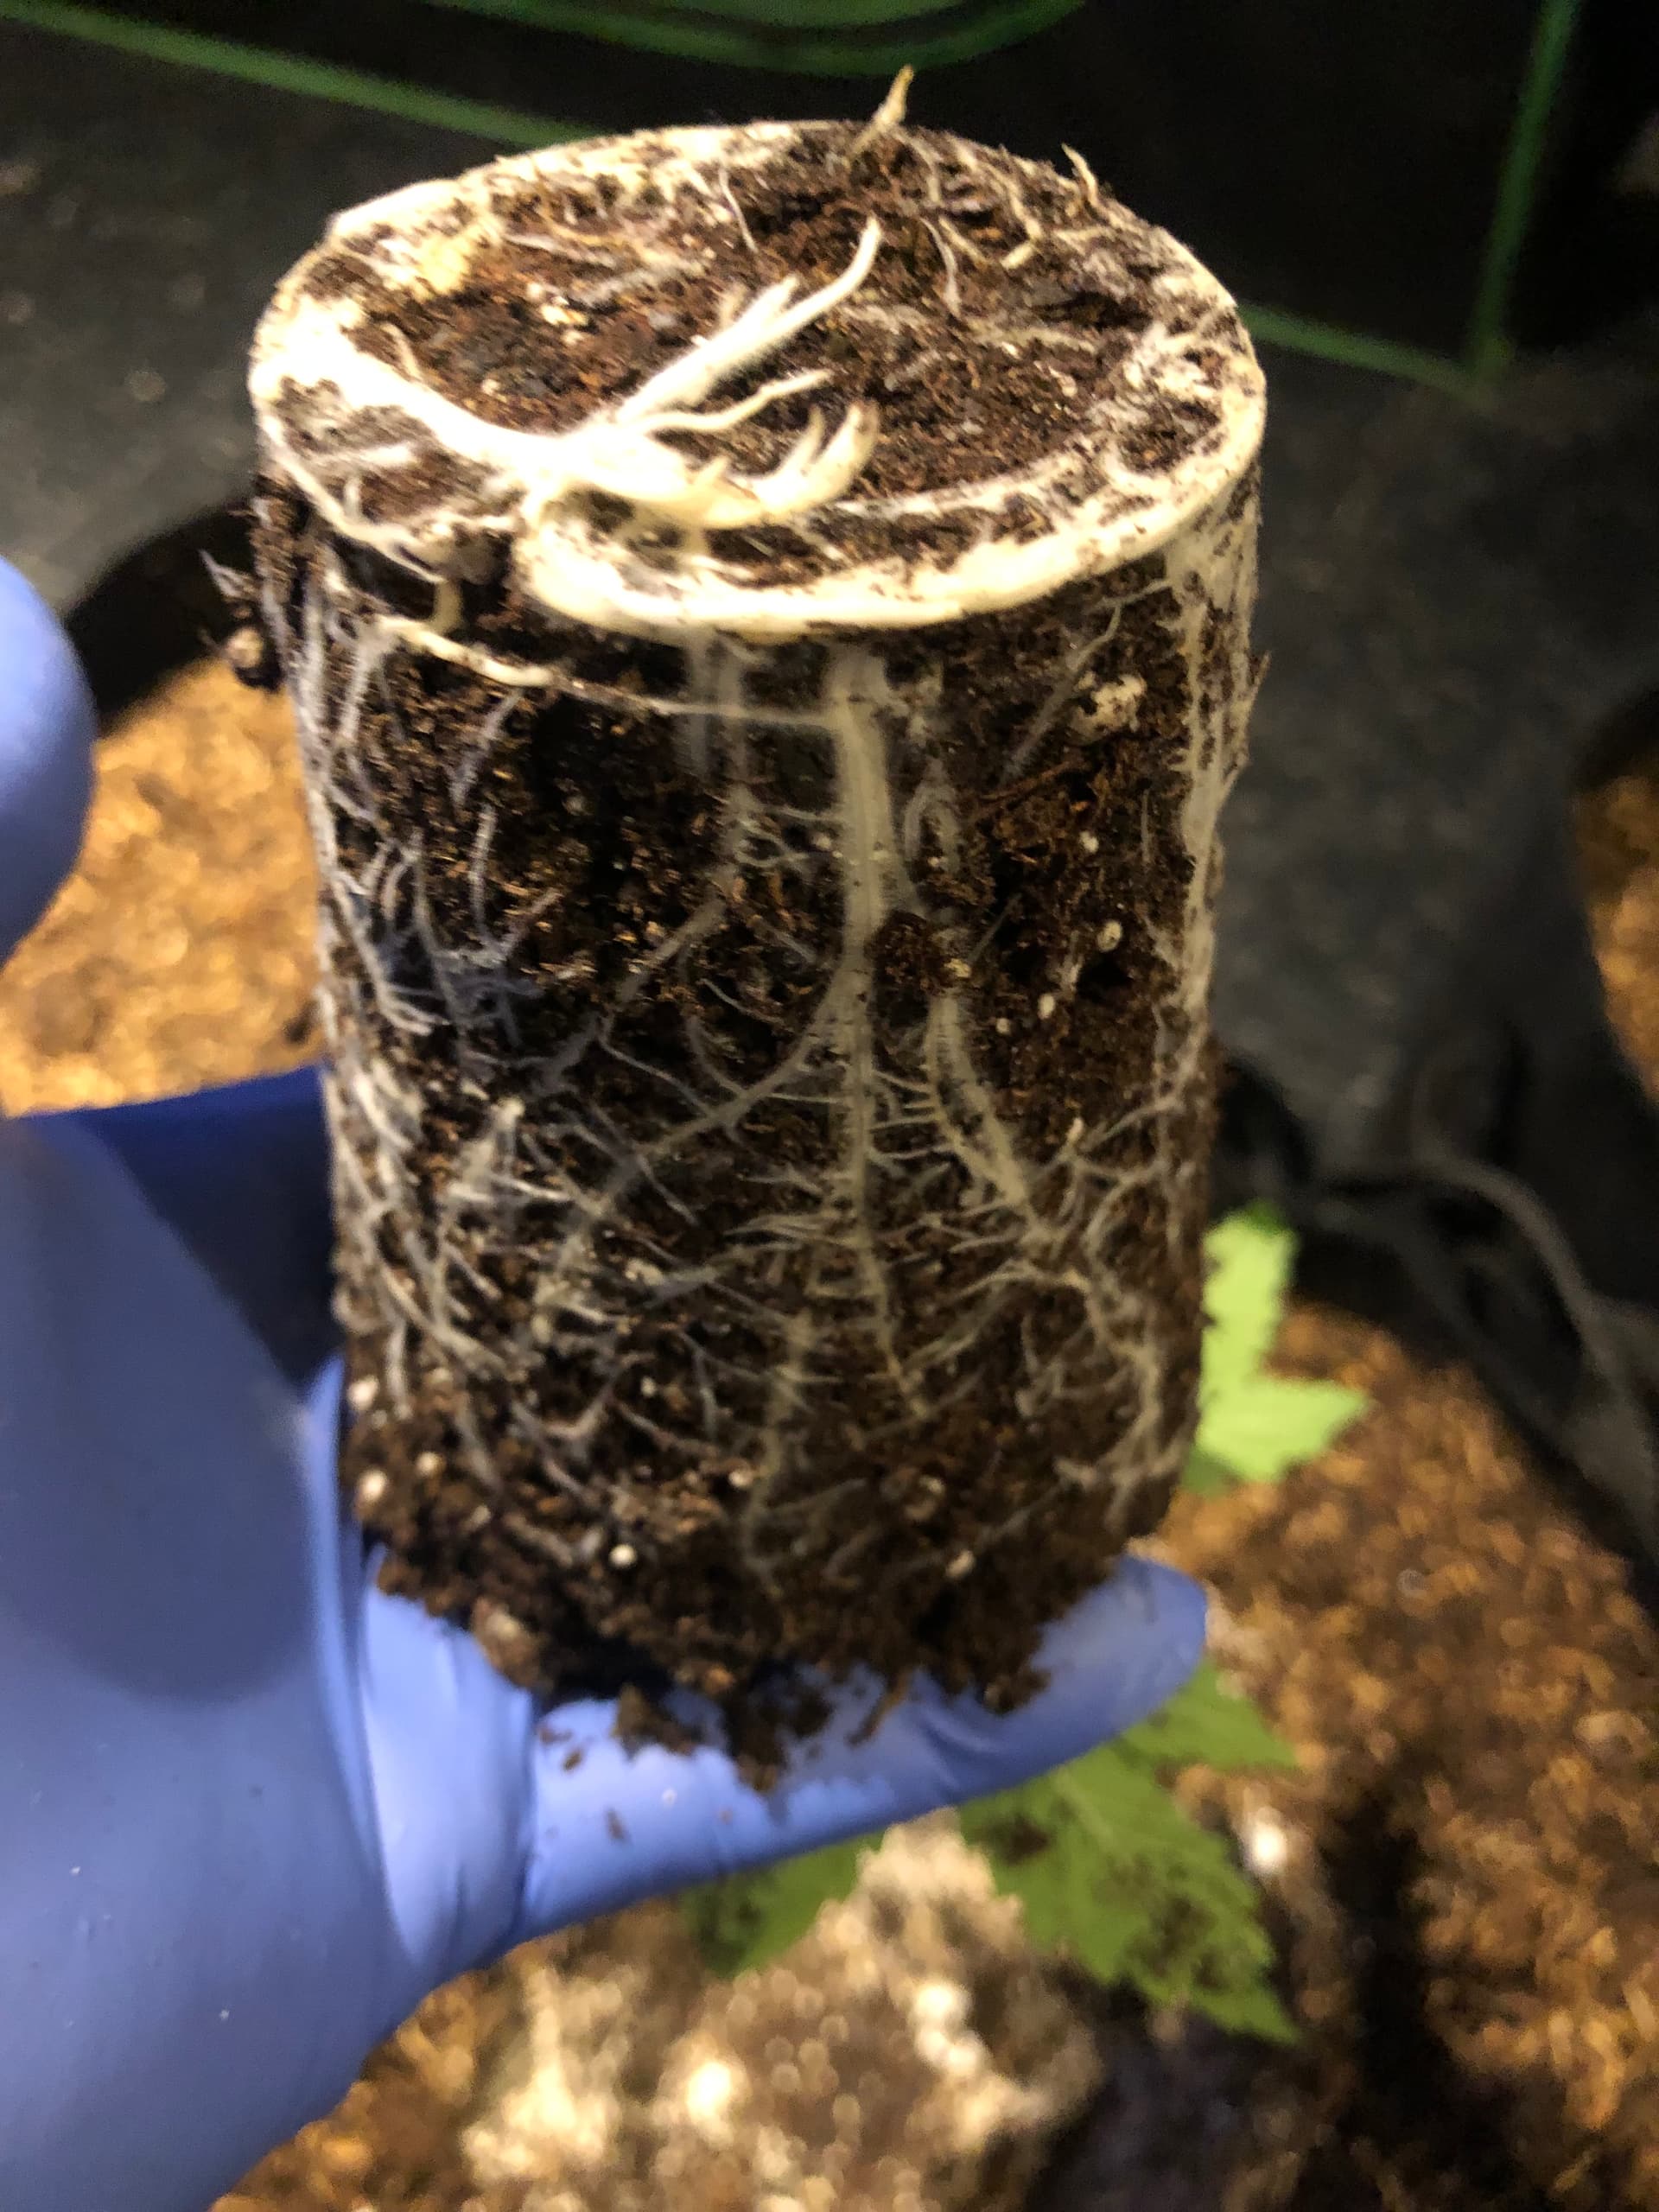
When the leaves on your seedlings expand past the edge of your solo cup . It’s time to transplant them . This should be about the time your seedlings have their third set of true leaves (Cotyledons are not true leaves ,Cotyledons are the first leaves your plant have and have a nuff nutrients in them to support your plant through the seedling stage) After the third set of leaves, you are now in the vegetative stage.
. First prepare your new pots with the soil of your choice. I’m using Coots soil recipe that has been cooking for about 6 weeks . I hope it’s not too hot… Take a cup the same size as your solo cup and make a hole in the soil for your transplant. This is when I add a little aloe Vera, Azos , and mycorrhizae. ( make sure the myco have contact with the roots. Now removing your plants from the solocup is simple. Some people slightly squeeze the sides of the cup to break the bond . Put your plants stem between your fingers flip and pull the cup off. Personally I do something different. I cut the solo cup in 2 spots and pill it like a banana and then flip . Add your microbes and put them in their new home. To make this process easier, don’t water your seedlings a day or two before transplant. And water your new soil about a hour before transplant.
.


5 Likes
My four girls have new pots and soil, (transplant stress) . New lights , they went from a 120W diy light to a 520w Hlg ( light stress) .Then I change their light cycle ( I don’t really think this is a stress, but who knows). Screwed up all the timers so the humidifier didn’t kick on . The fans turned off, when the lights turned on .temps hit over 100 freedom units ( heat stress) . I didn’t do anything right today. The runts (super silver haze) took it like a champ. .The other two (Fuel D OG ) are freaking out. One has dropping leaves and the other is getting a little lime color. Gave both of the cry babies a shot glass of water. And explained to them ,that they better suck it up
3 Likes