It is my off season for my tomato starts so I am using my set up for an indoor grow. I have had good success with outdoor direct in soil. I discovered the small size of auto flower after growing a gift of seeds. At first I thought I did something wrong.
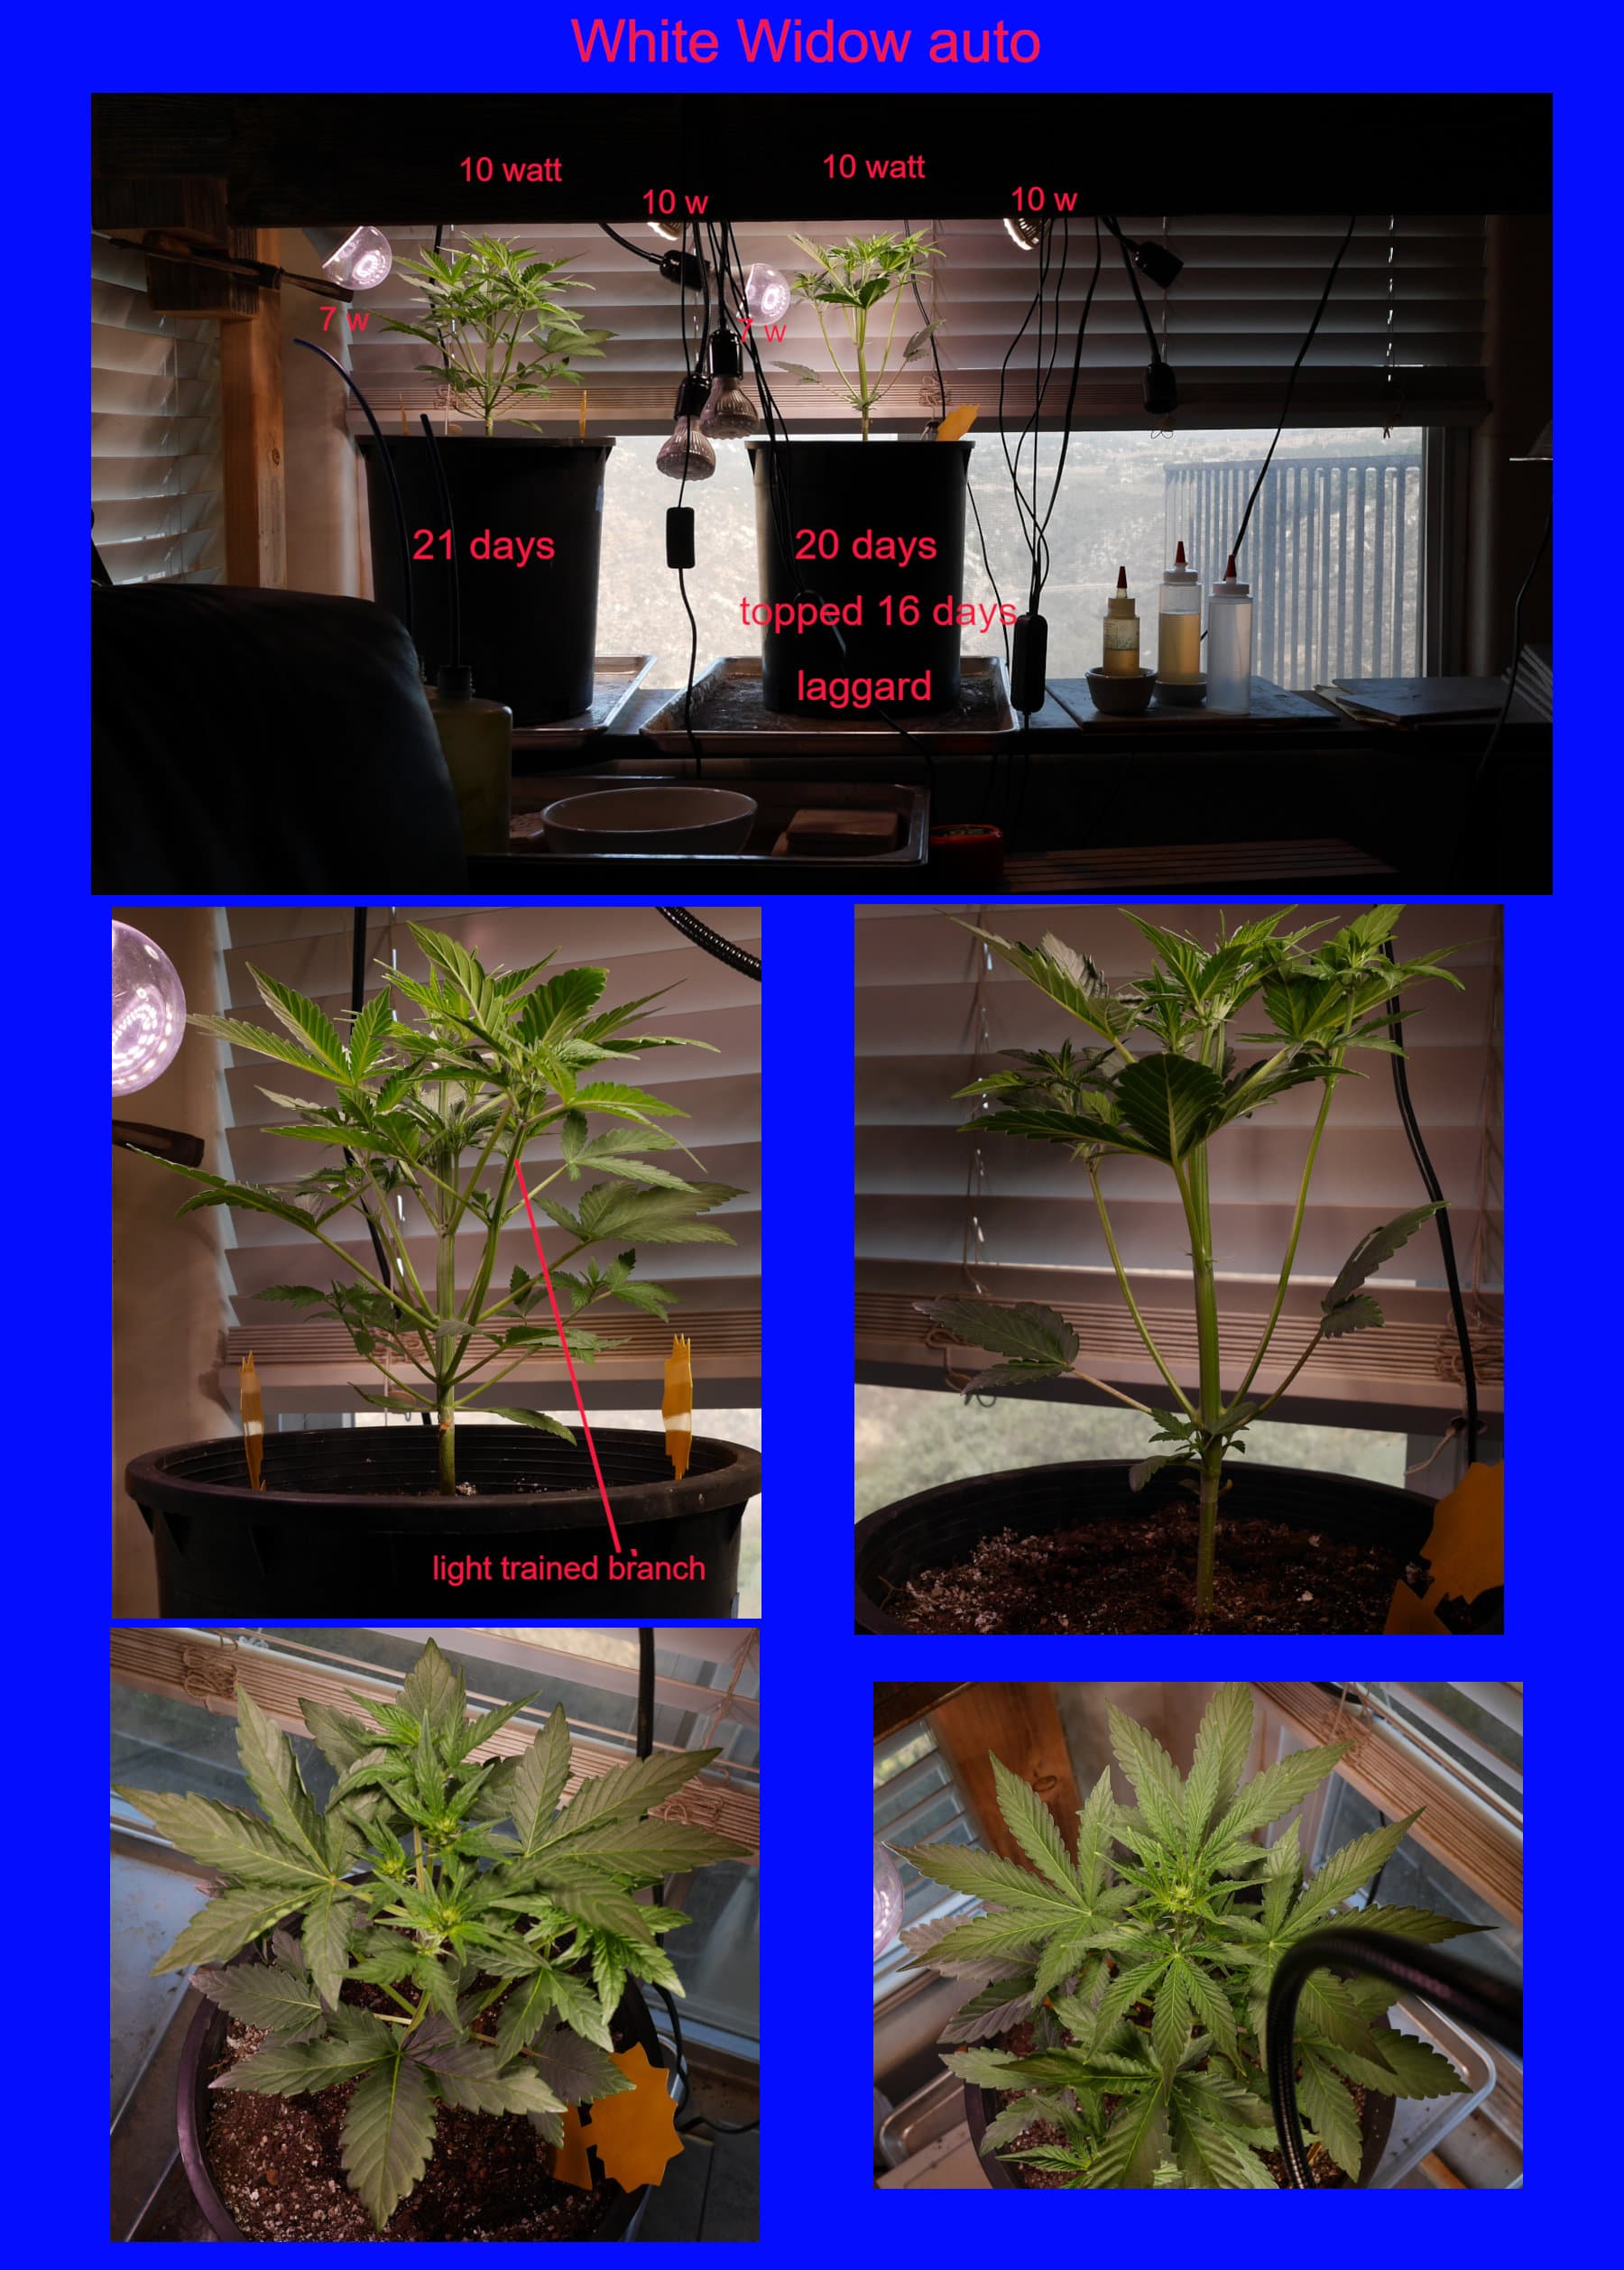
A little over a week from emergence, one looks good the other lags and took an extra day to get started.
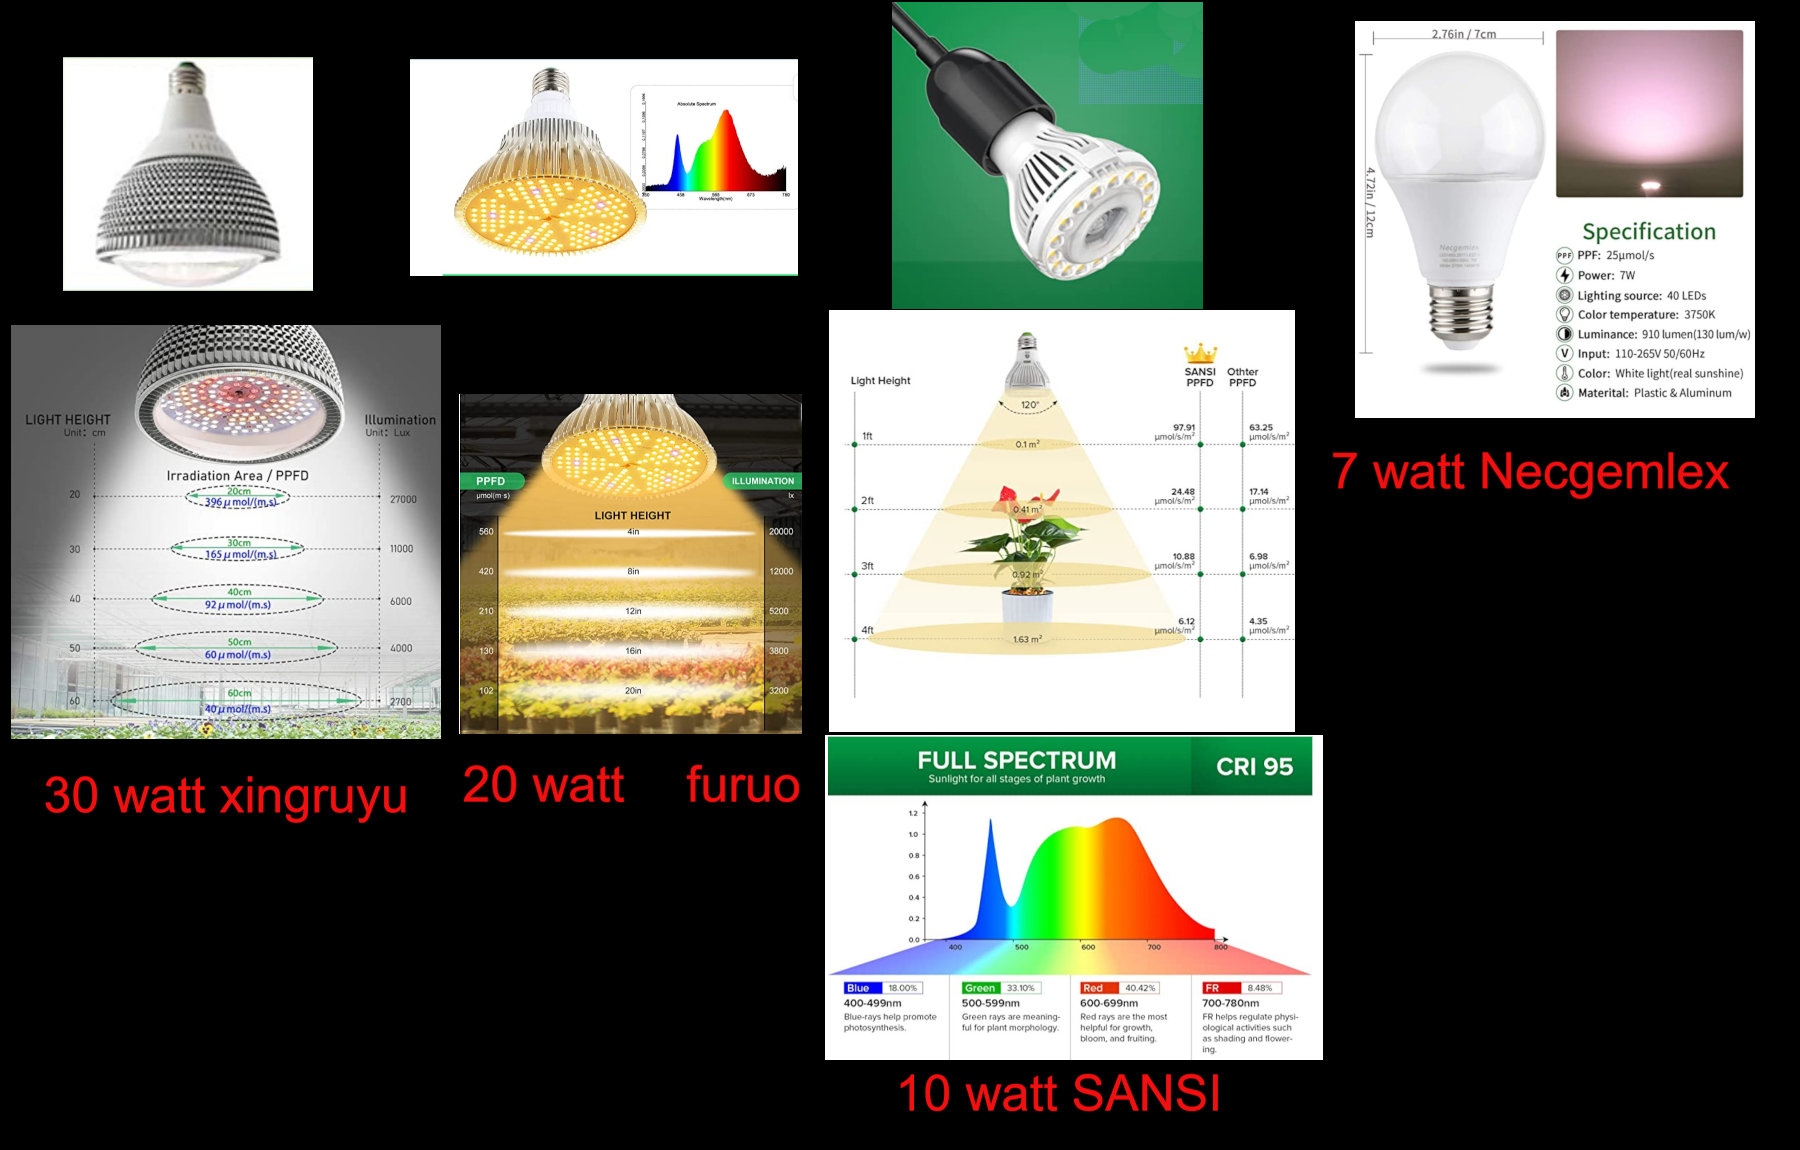
I am trying to do this with what I have. I started with low watt bulbs to save on electricity. My electricity is expensive. As the plants grow larger I will switch to larger bulbs. I am not happy with the 7 watt bulb. I have a light meter that reads lux. I get 23,000 lux when 3 inches away from the light source. I get the same reading when the 10 watt bulb is six inches away.
I did a little research and one source recommends 100-300 µmol/m²/s for seedlings. (I think that is 7100-21300 lux)
When the plants get a little larger I plan to use progressively larger LEDs.
There is a very wide range from being able to keep plants alive and growing and doing it very well. And it’s very difficult to be on high end of that range with any type of led bulb. It would take a lot of bulbs and for cost of continually upgrading bulbs and the amount of bulbs needed may be cheaper to just buy a proper grow light that has good potential of getting reasonable to good results.
If your electricity pricr is high, pay special attention to the efficacy of lights in use. Most led bulbs run about 80-90 lumens per watt but there are some horticulture specific led fixtures capable of running in excess of 200 lumens per watt. You’re not going to get them cheap, but high power cost and larger harvest weight usually makes up for itself within a grow or two.
I am guessing I will be at the low end of the range. I am going to try doing the best I can with what I have. My outdoor harvests have been good and I am not in need. Mostly curious and like the challenge.
I have six of the 30 watt (150 watt equivalent), three 20 watt (100 watt equivalent), two 10 watt and two 7 watt LED bulbs all with fixtures. I don’t think I have room for all of them in my small grow space.
My intent was to grow one plant to see the results, a learning experience for me. I started two as insurance. I will start another as a replacement when the first two get larger.
In addition to the lights I have other challenges. I don’t have the best grow medium. I am using recycled potting soil from my tomato\pepper\zucchini container garden mostly mixed and amended by myself. I am also going to use fertilizer that I already have.
Without much attention my outdoor grows have done very well and keep me in good supply. My biggest challenge there is what variety next?
This is usually workable if you’re able to look at plants and determine what if anything they need. From this aspect cannabis not all that different from tomatoes either.
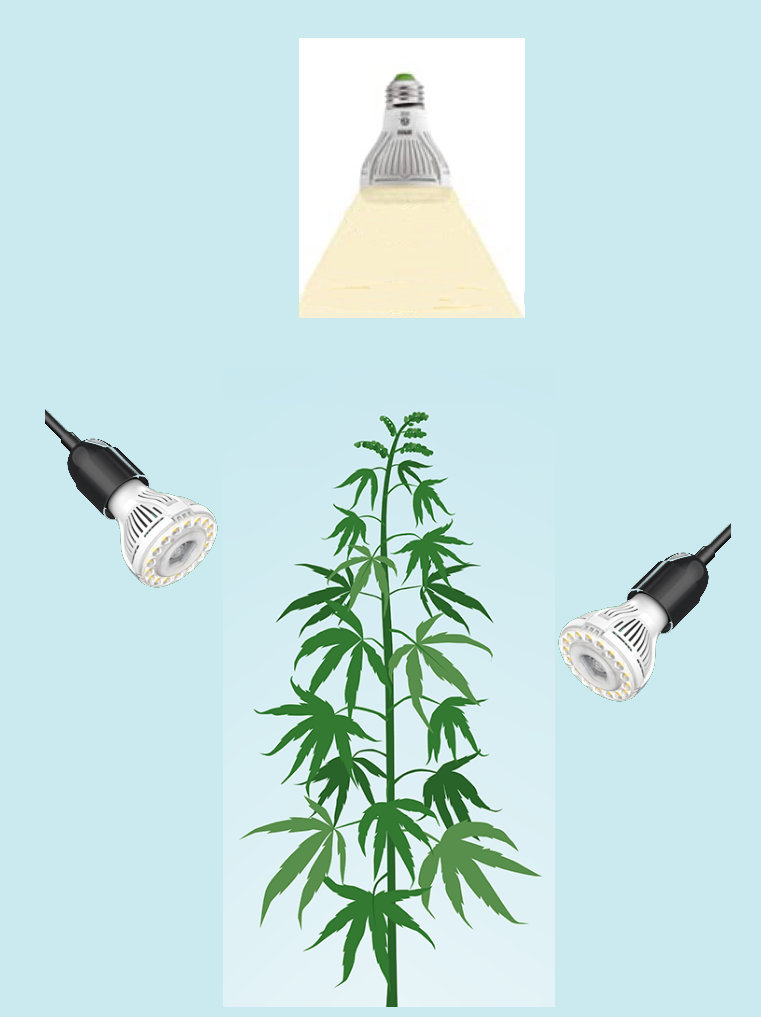
I am contemplating training. If I bend the plant I will need to add another light because of the wider canopy. The plant will also occupy more horizontal space. How is that better than just adding another plant? Either way I would need more light and space.
If I skip the training and the extra work I am guessing I might get a better cola. Also how about adding some additional light focused on the interior of the plant?
.
.
.
When it comes to bulbs, just being able to distribute them evenly over the top of your canopy is probably the best way to make the most use of their light output.
I’ve seen some growers do good things with horticulture LED bulbs. Not great, but good. Training will keep your canopy level and enable you to spread your lights evenly over the top of the canopy. If you have more vertical space than horizontal space, I’d probably top the plant once (make 2 main colas) and let ‘em grow like a double Xmas tree. Then you can spread outward and get 3 to 5 lights - one on each side and one down the center between the 2 colas.
I trust Dbrn’s lighting suggestions and advice, he’s been with me since day 1 of my grow and has never steered me wrong.
Thanks for the suggestion @Graysin . I will likely top at least one of the two plants. Best time seems to be dependent on growth habit / variety. A common recommendation is after the sixth node. Currently there are only a few nodes (11 days). The nodes are very close which might be an indication of the plants getting sufficient light.
I have done a little reading on LED grow lights. It seems like the blue range is better for the vegetative stage and increased red for the flowering stage. I looked at the spectrums for my existing bulbs. They are similar but one of the 20 watt bulbs has significantly more red. I will likely substitute this bulb in the flowering stage for one of the plants to see if it makes a difference.
I read that lux meters are not recommended for LEDs. I have a lux meter that does show differences between the bulbs but perhaps I shouldn’t trust the readings. To judge the proper distance for my lights I have been inching them closer and trying to read the leaves.
My 7 watt bulb seems significantly dimmer than the 10 watt. I have kept it 3 inches and the 10 watt at 5 inches. I discovered the 7 watt has a 120 degree cone and the 10 watt a 60 degrees cone which likely explains the dimness of the 7 watt. Now I am using just the tens.
My watt meter indicates the ten watt is eight watts and the seven watt is six watts
14 days since emergence. I wanted to see if I could encourage some interior growth. It is hard to see but one of the branches about doubled in size after only 8 hrs of sidelight (7 watt bulb).
I started my seeds by soaking in water for about eight hours. After the soak I placed them on a block of wood floating in water. Then placed the lid on the Pyrex glass container. When I first see evidence of a sprout forming I plant the seed. I don’t wait for a tail but sometimes there is a little one. If I need to lable I place a piece of tape on the lid. If I need to increase the temp I place a ceramic floor tile on the 500 watt burner to even out the heat and set it to the lowest setting with an aquarium floating thermometer inside.
In the past I have soaked weed and tomato seeds in water until they sprout. I tried the same procedure with squash seeds and couldn’t get them to sprout. I tried the paper towel in a bag technique but didn’t like it. Access to the seeds was difficult and many paper towels fall apart. With this set up I haven’t had any trouble sprouting seeds. I think seeds like a little more oxygen than they get with a pure soak. After placing the seed on the block of wood I add a little drop of water off the tip of my finger about twice a day until they germinate.
I cross cut 2x3s for the blocks of wood. I think cross cut gives better water penetration.
I have purchased some side lighting fixtures. I started with a single and liked the results. I can focus on an interior branch and coax it to grow. I now have a single a triple and a quad. The single and triple have individual switches. The quad turns on two at a time. The max rated wattage per gooseneck is 10 watts.
I also added a few more small LEDs. Now in addition to the tens and sevens I have thirteen and nine watt bulbs. The cone angles are 60 or 120 degrees. I can’t use the 13 watt bulbs (probably could) in the side lights so they will be used overhead when the plant looks like it wants 13 watts instead of ten.
The price per 10 watt bulb including the fixture works out to be less than $10 each.
I believe you can remove the diffuser from the bulbs and still use em, but I don’t recall if that’s an even remotely accurate belief. @dbrn32 fact check?
Correct in terms of something like a typical household a19 or a21 styled bulb. Earlier models had diffusers that would snap into place and could be pryed off with screwdriver. Most of the more recent I’ve seen have the diffusers glued and require being cut off. Either way, the diffusers on this style of bulb eat up some photons.
I will use the LED household lights if I run short on LED grow lights. I gathered from a little reading that they are ok but the grow light version is better.
The only light spec I can find for my household lights is daylight 5000k. The grow light LEDs publish the light spectrum graph and full spectrum 4000k. To the best of my knowledge 4000k is warmer than 5000k and contains more red. 5000k leans more towards blue.
The description for my 30 watt LED grow light includes the following.
【Daylight Full Spectrum Grow Bulb】 – 137pcs white LEDs and 29 warm white LEDs mixes all wavelengths between 380-780nm can be fully absorbed by plant photosynthesis, and with 18pc red LED (620nm) + 8pc red LED (660nm) + 8pc IR can more effectively promote photosynthesis,germination,flowering and results.
Those red LEDs are probably missing from the household lights which probably accounts for the higher temperature (5000k).