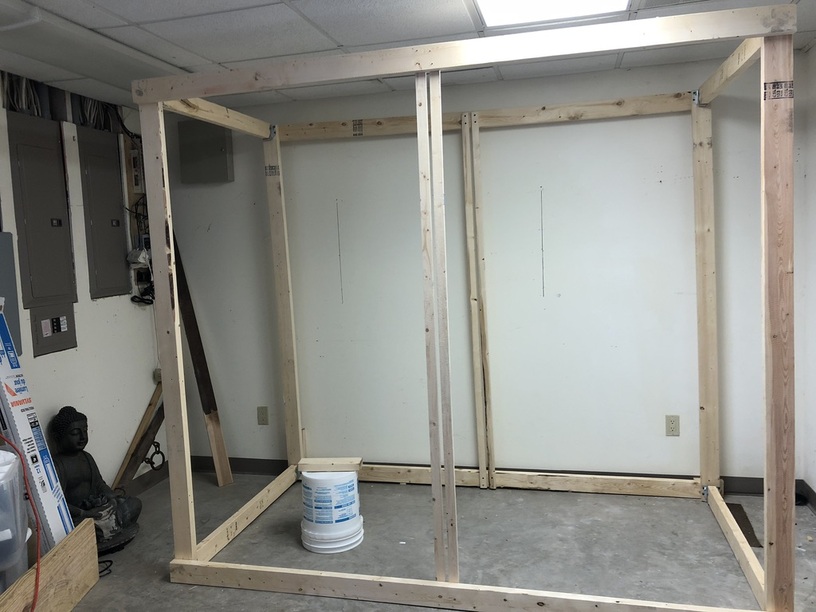
The construction is largely 2x4’s.
The foot print is approximately 4’x8’ and about 7’ tall.
The 1x2’s in the center of the structure are intended to hold a sheet of dry wall. The dry wall’s purpose was to divide the space into a flower room and a veg room. My thought was to keep production constant, veg on one side flower on the other.
The completed frame looked like this:
6 Likes
@Nickdanger I had the same set up I used Panda plastic for my walls works awesome You’re looking good can’t wait to see the final product
2 Likes
And it’s perfect because you have your panels right there so you can run your own circuits for your lights I’m excited for you
3 Likes
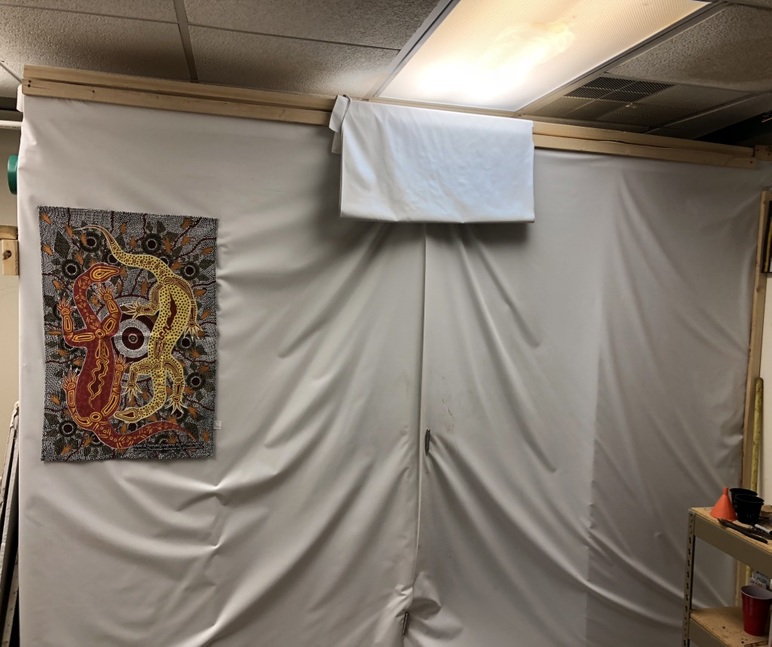
I used black out cloth I purchased from Amazon to finish the outside. This fabric absolutely blocks all light that might mess with your girls in flower.
The original completion looked like this:
4 Likes
I thought it was pretty tight when I finished.
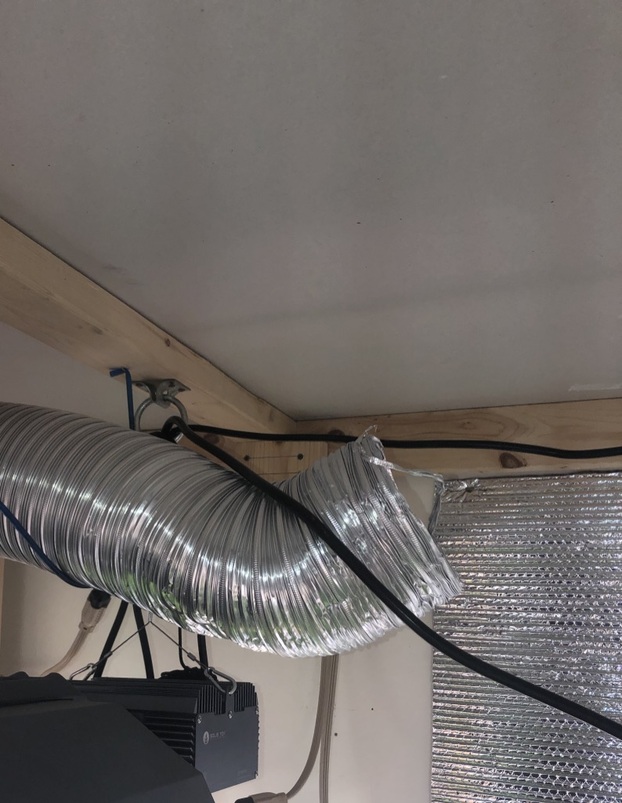
Putting the room into production quickly pointed out the flaws of my initial design.
I didn’t install any type of air-exchanger, thinking the basement should be cool enough.
It wasn’t.
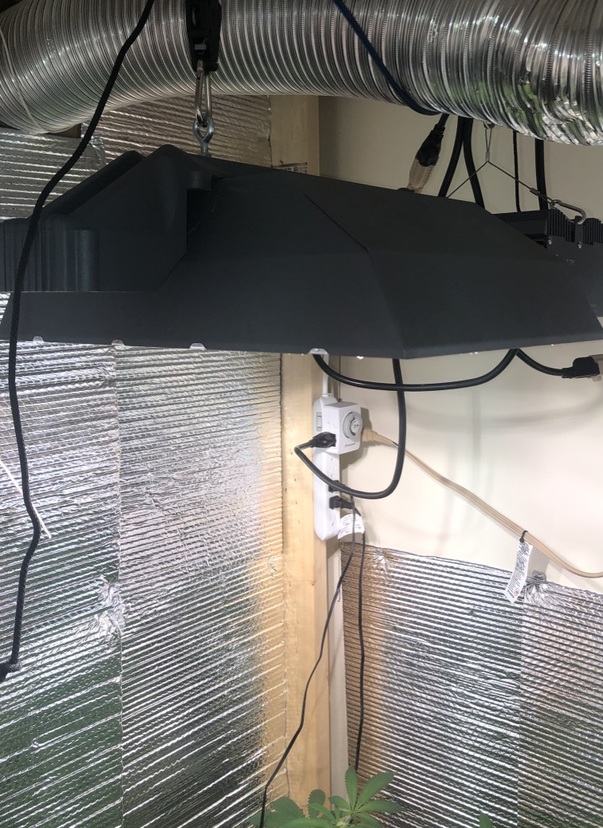
My (initial) light (a Solistek 650/w cmh) produced way more heat than was conducive to growing.
So after the fact I had to install a venting system (this I believe comes under the heading of “live and learn” or “don’t try to be a cheap bastard”).
Notice how the intake hose can be fixed high to draw in the warmest air or taken out of its bracket can be put closer to the floor for cooler air (first pic).
The following pics in order are intake fan inside grow room (second pic).


3 Likes
evrything is looking good so far, my onlysuggestion would be to move your centre divider more to one side. your flowering area will need to be bigger than the veg area.
cheers mountainman 1
3 Likes
Holy Mountain, Man, you see my next design flaw.
I figured that one out on my second more successful grow.
I’ll follow up with that idea shortly.
3 Likes

No way you can connect that ventilation to the building’s hvac system? With that you’d have automatically controlled air (75°F+/-?) with the added bonus of all CO2 exhaled by people in the building. You would aid the air in the building for humans because the plants would produce oxygen (unless you’re adding high levels of CO2).
You’d have to duct into both a feed & a return of the hvac system but you could add that big fan of yours right into the return ductwork. You’d have an excellent ventilation system that steals almost nothing from the hvac system.
I’m an admitted Noob on this board and I really screwed up my first post because I didn’t understand picture loading.
Back to the evolution.
My first grow was an attempt at Nutrient Film Technique ((NFT).
I will say this, it was way too complicated for a first (serious) try at indoor Gardening.
This was also my first attempt at hydroponics.
I got that crop into flower before I killed or damaged my plants beyond recovery.
I have absolutely no shame about failing while learning something new.
I learned a lot from that experiment.
This gives you some idea of how the grow room was set up when veg was on one side and flower on the other.

Besides my poor engineering, the NFT system failed because the roots eventually blocked the nutrient exit port.
The roots were flooded and drowned, killing the plants.
So my next attempt I went with a simpler system, a variation of Deep Water Culture (DWC).
The picture below is the girls first day in buckets after about two weeks as seedlings.
The 2"x4" cross bar was added to hang the air pumps.

You can’t tell by the pic but I’ve got 8 5Gal. buckets in about 4’X4’ of floor space.
My single 650W was enough to keep all from getting leggy.
The next design flaw I discovered was the view tubes, on the buckets, I had installed to monitor solution levels.
They let in way too much light, causing quick growing algae in the reservoirs.
The algae will steal nutes from the plants so they must be checked hard.
I tried eliminating the tubes and patching them with duct tape on both surfaces (inside and out).
Duct tape as a water seal only worked on a couple buckets (these are food safe buckets so I wanted to salvage them if possible).
On the buckets where the duct tape seal failed I re-installed the view tubes but covered them with blackout cloth to prevent light entry.
At the bottom of the picture (below you can see the blackout cloth “bibs” I put over the view tubes to block the light.
The plant in the pic went from seedling to DWC on 1/1/19 (about 8 weeks old in the pic).
Note: the bib may be hard to discern in this photo but it is covering the portion of the bucket facing out.

Key point: eliminating or covering the view tubes made a huge difference in algal growth. I wasted a lot of time and material on the view tubes and they’re essentially useless.
The most significant change I made to the original “Grow Room” structure was the elimination of the divider.
This experiment involves 8 plants/4 strains, two plants of each all growing in DWC.
I learned this, you can’t fit eight adult plants into a 4’x4’ grow space.

In the picture above, the panel occupying the right third of the picture was formerly the flower side door.
I covered the door aperture with sheet rock and removed the divider between flower and veg. rooms eliminating any space for veg.
The upper center/right portion of the picture shows four plants now occupying all of the previous flower room.
On the left and largely out of site is the former veg room, now occupied by four more flowering plants.
Both sides are lit with Solistek 650/W CMH lights.
This crop has about a month or so to go.
When/if this crop makes it to harvest I plan on re-configuring the grow room again.
The square foot print has some draw backs, mainly with fixed walls it makes it hard to access some of the plants.
In my next configuration I’m planning on essentially a one row Grow room.
I’ll have one long row of DWC pots under a light mover.
Two of the walls will be existing walls of my building.
I see this new “Grow Room” about three feet deep and about 10 feet long.
On the long open side I’ll be able to access each plant without having to move any other plants when changing solution, etc.
There won’t be a door per se, instead when you need to access plants you’ll remove the cover on the long side of the grow room and when your accessing the plants you won’t have to physically enter the grow space but rather stand on the edge of the grow room.
Does that make sense?
One insight I’ve have gained via this experiment is an abiding love for DWC.
Still in my next grow I’m going to try aeroponics on at least one bucket.
My sheet metal skills aren’t up to that level and my part of the country is still backwards on the sacrament, so skilled labor is out.
However your idea is brilliant!
It’s easy. Got a Home Depot or something like that?
You’re rooms aren’t that big.
You can just get 6" or 8" or . . . whatever size you like (your pics show some pretty fat duct :-])
round, insulated duct:
And a ‘starter collar’:
Find an a/c vent near your room. Then find an a/c return. They’re probably in the drop ceiling. The return vent grate is usually bigger than a feed & if it’s running and you put a piece of paper over it, the paper should stick or at least try to.
If you see 2 vents close together, one is probably a return.
You just need to tap into the closest duct you can to each (feed & return).
Chances are high that the duct work near the vents is fiberglass, not metal. Even if it is metal all you need is a pair of tin snips and you can cut a hole in it real easy.
Cut the hole in the duct so the starter collar can slip in.
Bend the little ends inside the duct to keep it there.
Slip your new round duct over the collar.
Tie a big zip tie around it.
Tape it with duct tape or better, HVAC foil tape.
For the duct running to the return, you’ll want the end at the room right at your room’s ceiling height to suck the warmer air out. The air coming from the feed will fall because it’ll be cooler than the air around the lights.
Based on our local weather and our building’s location in a deciduous forest we rarely run central air.
Last year (surprise) was unconventionally warm and we still only ran our air for a total of four weeks.
My experience (from my first grow) is that I’m going to need to run a room A/C in the summer months for my current configuration due to the heat of my lights (and if I do another grow with the current set up).
Ah, I guessed wrong. I thought maybe you were in a commercial building.
But - you’ve got foxes!!
Well, maybe for another grow, another place:)
1 Like