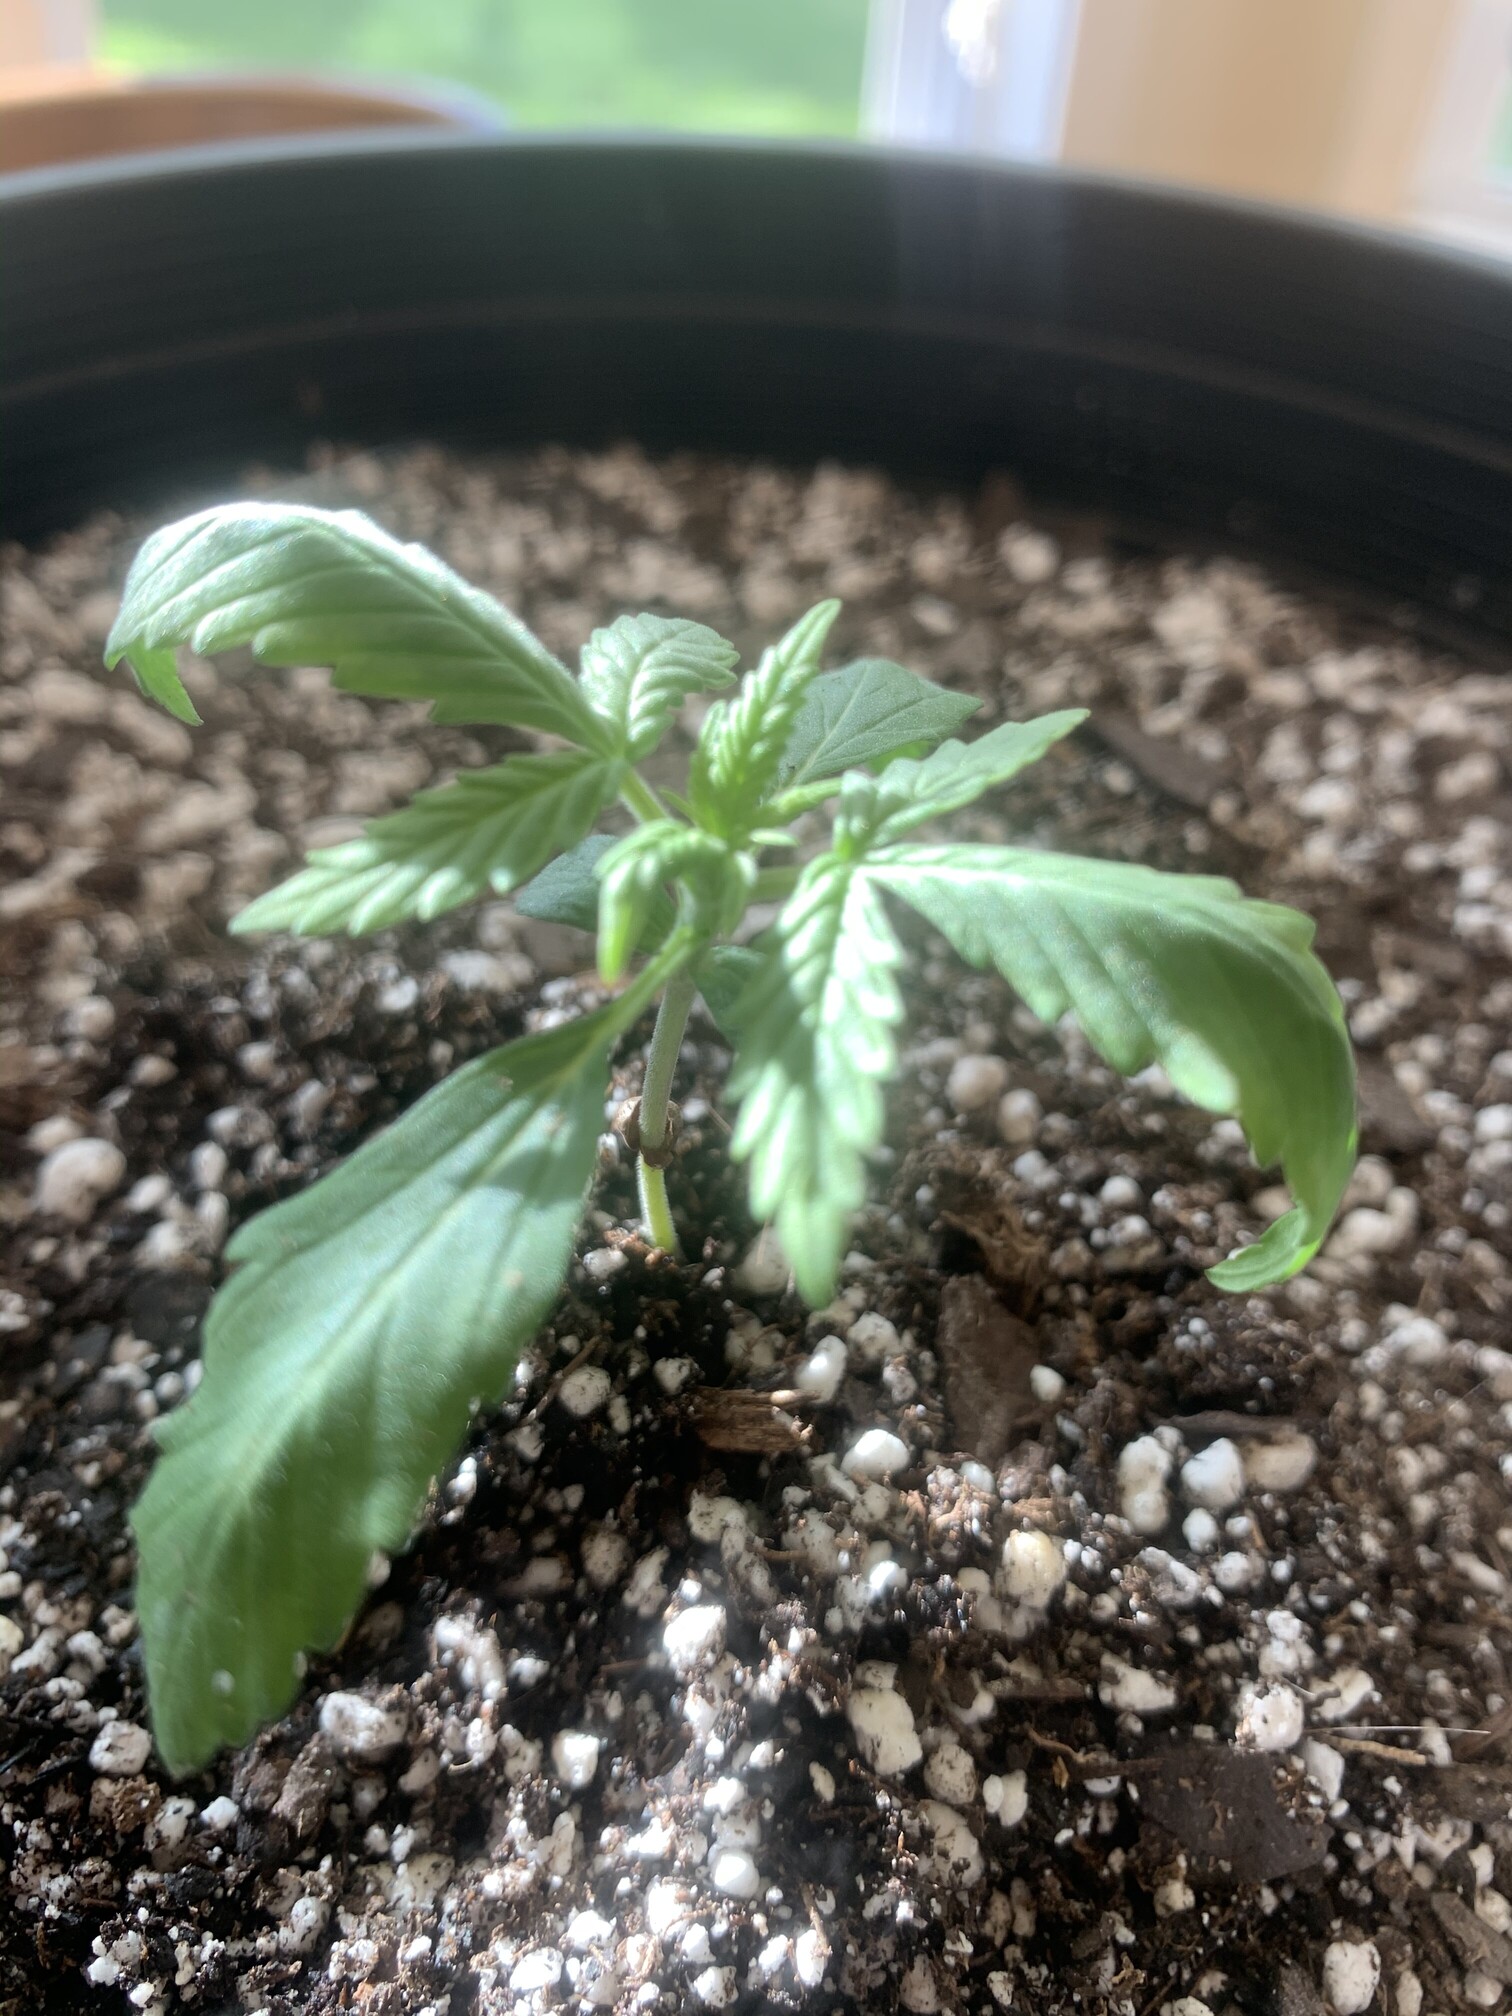
Wife and I tryin our hand at growing. Last Thursday, March 4, 2021 we soaked five seeds from ILGM Granddaddy Purple. After 48 hours they all sprouted and we put into pots last Saturday, March 6. They are all in a grow tent with a 1200 watt Full spectrum LED light hanging 24” over the pots (per the directions in the lamp) Running 18/6 cycle with automatic humidifier @80% and temperature @79-81F during day and 72 at night when light is off. Within a day or two they sprung right up. Tomorrow will be one week from potting and the growth seems to have slowed. The leaves don’t seem much bigger then earlier this week and they look tall and leggy in my opinion but maybe they are normal and I am over reacting. I have read posts that say this is a sign of light being to far away but I don’t want to move it closer and burn them. How do they look to y’all for being 1 week old???


What is the growing medium? What brand?
@Wildfire50210 Congratulations on getting a first grow started, I literally will be cutting my first down this weekend and starting them to dry. I’m excited to follow you and your wife’s journey. I didn’t put mine straight into a large pot, I started them in solo cups first. Below is a photo of mine at 9 days from seed in soil and again at 24 days… mine are Super Skunk from ILGM, what strain are you guys growing??


Idk of it helps because new myself but I’ve pretty much always read humidity around 50%…maybe it’s too stuffy for the new plants
@CMichGrower trying a couple different things. Two of them are just Fox Farm Ocean Forest with perlite others are a blend of Fox Farm ocean forest with some Pete Moss, lime and perlite. All of the pots had a slurry test of 6.5ph. When they were planted the soil was reading moist. I’ve never gotten the soil wet enough to have run off. Since the soil was moist I planted the seeds and just used a spray bottle couple times a day to keep them that way
@ThomasM36 thanks so much Thomas congratulations on your upcoming first cut! Can’t wait till we get there. ![]() We opted to go straight to their final pot because they’re autos and from what we’ve read it just slows the process with the stress of transplanting. These are granddaddy purple autos.
We opted to go straight to their final pot because they’re autos and from what we’ve read it just slows the process with the stress of transplanting. These are granddaddy purple autos.
For atleast 4 to 6 weeks u just need good phd water or distilled water ro water. If tap water make sure u ph it get some cal mag for just water days. Give the pot a good soak down til u see drips coming from the bottom and then leave it for a few days. Might be syarving for some water. Dirt thru the middle where roots need water is prolly dry from not watering. Give it a good soak down and watch 2 or 3 d a ys her take off.
Seedlings are stretching. It would be good to lower lights to reduce that stretch. A clear dome over seedlings will up RH to near 100% which is where they want to be for the first couple of weeks.
This tells me you have a soil probe type meter: if so ditch it as it’s worthless.
That’s what the company told you but what is the actual draw from the wall? This is the more important datum than what light is ‘equivalent’ to.
@Mark0427 sounds good Mark. I have a 5 gallon bucket of tapwater aired out for a few days to remove the chlorine. Then I put the whole bucket in the tent so water temperature would be consistent. I will try the Cal mag thanks!
Only add cal mag to water only days as alot of nutrients have calcium and magnesium in them already. Or atleast make sure u wont be overdoing it by adding calmag. I only do calmag on water only days because i use ro water which is stripped of basically everything but the water lol
@Myfriendis410 Thanks for the reply. I will get some domes and lower the light. What type of tester would you recommend to test soil moisture? Have an Apera PH20 tester for PH but other than a cheap probe as you say how would you test soil moisture? The light I have is from Amazon FSGTEK 1200w LED.
@Mark0427 I hear ya ![]() right now because they’re only a week old we’re not adding any nuets. Just trying to keep the soil moist but not wet so every day is pretty much a water day haha. But only in small amounts to keep it balanced. Since we didn’t saturate the soil to run off before planting I’m afraid to do it now and drown the little guys.
right now because they’re only a week old we’re not adding any nuets. Just trying to keep the soil moist but not wet so every day is pretty much a water day haha. But only in small amounts to keep it balanced. Since we didn’t saturate the soil to run off before planting I’m afraid to do it now and drown the little guys.
Most of us learn the ‘pot lift’ method. At this point however your plants should be watered with a spray atomizer and just spray the inside of the dome twice a day for two weeks. Seedlings do not collect moisture from soil as they have no tap root to do so. Moisture is pulled from the air; thus misting a dome and having that over the starts.
This is a 240 watt light with a small footprint. It might flower out a 2 X 4 space or a single plant.
Welcome to community and and awesome for the goals with the wife , do need a better light
Hey bud,
It could be a few things, I want to address your plastic buckets first… before your girls get to big. DRILL HOLES in your bucket so air gets to them. After they sprout you did good by putting them in their home right away. You don’t want t leave them in a Dixie cup. It’s a common mistake that a lot of people seem to make. It will become root bound fast, and you want the roots to grow from the stock outwards and down, if you do not drill holes they will grow to the side of the bucket, a d start growing in a circle and grow into a giant root ball. NO OXYGEN, no air flow= no growth. So drill holes. Second it could be ur grow medium, but it’s likely the light… try moving it closer it doesn’t need to be that far or fur. The light power up of you don’t want to move it closer. They could have slowed because of light, or grow medium. Get a spray bottle filled with water and spray them a couple times a day… on top of the plant. Send pictures when you move the light… or turn it up. ![]()
Appreciate everyone’s help!
@Myfriendis410 Would adding a 2nd light like this one in daisy chain help? I thought LEDS we suppose to be superior due to low watt draw while still delivering the same results as others. I don’t know where they got 1200w from. Do they may be think this is an equivalent to a CFL or something?
@Luna I don’t know if this helps but the pots we used have pretty good size holes around the base of them. We put P-gravel in the bottom of the parts to help with drainage and maybe circulation versus packing them solid with soil. Once the gravel sufficiently covered the holes we put the soil on top of that. Do you think the pots still need holes? If so how many what diameter how far apart? Thinking of getting an additional light to help as well

There are LED’s and there are LED’s! What is coming out of China are inferior diodes yet claim wild performance values, including this ‘claiming’ a certain performance but using a fraction of the wattage. Not so!
Like anything else it costs money to get quality. Many of us have been burned by these outrageous claims and frankly Amazon ought to put a stop to it.
There are a number of reputable companies that produce solid lights using Samsung diodes (which, according to Samsung, NONE of the China lights use). They publish PAR maps generated by independent labs and don’t claim bizarre metrics like you see on the A.
HLG is the numero uno right now but look at CHILled Logic, California Lightworks, Spyder Farmer and several others. They ain’t cheap. But they ultimately will save money by increased efficiency (lower light bill) and higher yields.
The other option is to diy it. This is what I did as I had a supply of aluminum I could use for heatsink material. My lights blow away anything you could get off of Alibaba and they are first gen diodes: we’re on 4th gen stuff now which are frankly incredible.
Save your beans and spend em on a gucci light and you’ll never regret it.
How many holes that size? Put hydroponic clay balls or rocks on top of plant once it is big enough. It stops the light from penetrating the roots, and this will allow your roots to grow within the first 25% of the bucket. Usually the roots grow straight down then spread, but with these they branch out right away and use most of the pot. With more holes more oxygen can get to the roots, more growth. Drill like 15? Just regular drill holes like the size of a pen diameter… that’s for air not for drainage… from top to the bottom. The holes you have there are enough for drainage, but add a few smaller ones randomly for oxygen ![]()
![]()
) but

Update: @Myfriendis410 @Luna @Mark0427 @ThomasM36
So we added domes just misting the inside twice daily. Distilled water with a pH of 6.2 and we mixed in some Fox Farm nutrients based on the second week, lowered the light and switched to 24hr light schedule the last few days they really took off.
But now leaves are sagging and getting some discoloration. Tent feels/smells so humid almost musty.
Today we took the domes off, drilled holes in the pots and moved in a fan to air things out and added a 2nd Light until we can afford one good model (so two plants per light). Got some clay leca pebbles and cal mag on the way.
Suggestions / Comments? Don’t want to loose these guys ![]()


Put some air flow across and make sure you’re exchanging air from outside as well. I take the dome off over time, giving them a few hours a day until they look like plants instead of sprouts. If you are in soil I disagree with starting any nutes. As you are using the soil feeding schedule I’m assuming that’s the case. That could account for the look of plants and FF is famous for nute burn.